
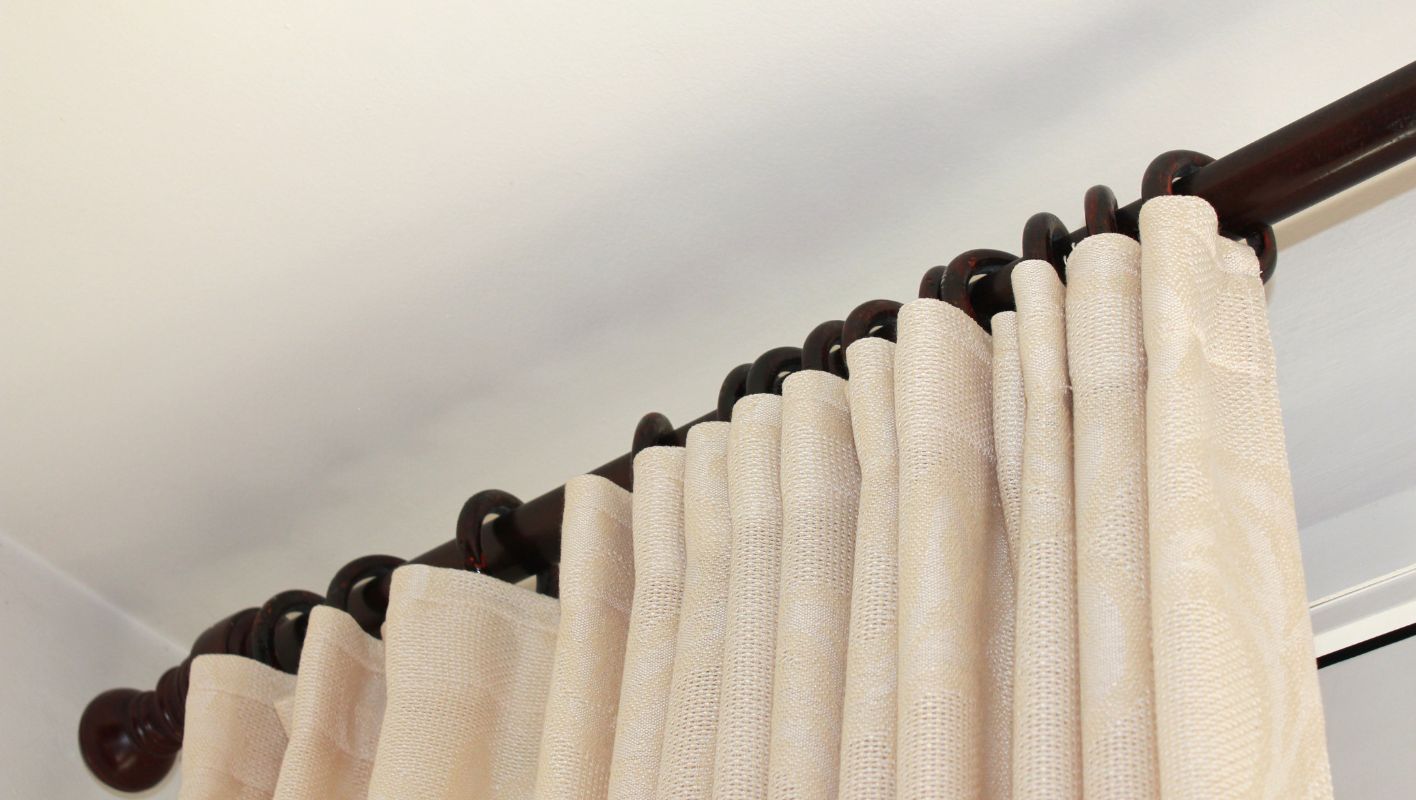
Transform your living space with perfectly hung curtains!
To successfully hang curtain rods, start by determining the ideal height and width, using proper tools for installation, and avoiding common pitfalls. Consider factors like window size, curtain style, and desired light control for optimal results.
I remember the first time I attempted to hang curtain rods in my home. It felt daunting, but the sense of accomplishment when I finally got it right was incredible! To ensure your own success, let’s delve into some essential tips that will make this task not just easy, but enjoyable.
In this comprehensive guide, we’ll explore in-depth tips and techniques that go beyond the basics, ensuring you have all the knowledge needed to achieve a professional finish. You’ll be amazed at how much a well-hung curtain can elevate your space and mood!
Curtain rods should always be hung at eye level.False
Hanging curtain rods at eye level enhances visual appeal and functionality, but height may vary based on window size and personal preference.
Using the right tools is essential for hanging curtain rods.True
Proper tools ensure accurate installation and prevent damage, leading to a more secure and aesthetically pleasing curtain setup.
What Tools Do I Need for Hanging Curtain Rods?
Are you ready to transform your space with beautiful curtains? Trust me, nothing quite elevates a room like the perfect drapes. But before diving into this DIY adventure, let’s make sure you have all the right tools at hand!
To hang curtain rods properly, you’ll need essential tools like a measuring tape, level, drill, screwdriver, wall anchors, and a stud finder. Having these tools ensures a secure and professional installation.
Essential Tools for Hanging Curtain Rods
Hanging curtain rods is not just about style; it requires the right tools to ensure a secure and professional installation. Here’s a detailed list of the essential tools you will need:
-
Measuring Tape
A measuring tape is crucial for determining the correct width and height for your curtain rods. I remember the first time I tried to hang curtains; I measured everything wrong and ended up with lopsided drapes! Accurate measurements will help you avoid any misalignment during installation. -
Level
To ensure that your curtain rods are straight, a level is indispensable. There’s nothing worse than hanging rods that tilt or sag over time. I learned this the hard way—my first installation had me cringing every time I walked by! -
Drill and Drill Bits
A power drill is essential for creating holes in your wall. Depending on the type of wall (drywall, plaster, etc.), you may need specific drill bits to suit your installation needs. I always keep a few different bits handy because you never know what you’ll encounter! -
Screwdriver
While some curtain rod brackets come with a built-in mechanism for easy installation, having a screwdriver handy can facilitate any adjustments. It’s like having a trusty sidekick—always ready for action! -
Wall Anchors
If you’re hanging heavy curtains, wall anchors provide extra support to prevent the rods from pulling out of the wall. I once had a mishap where I skipped this step, and let me tell you, it was not pretty when the whole thing came crashing down! -
Pencil
Use a pencil to mark the drilling points on the wall based on your measurements. This little step can save you so much trouble later. -
Stud Finder
If you’re installing into drywall, locating a stud is crucial for added strength. A stud finder will help you identify where to place your screws securely. Trust me; it’s worth the investment!
Additional Tools for Complex Installations
In some situations, you might encounter unique challenges that require additional tools:
| Tool | Purpose |
|---|---|
| Ladder | For reaching high ceilings or placing curtain rods above furniture. |
| Clamps | Helpful for temporarily holding brackets in place while you drill. |
| Safety Goggles | Protect your eyes when drilling or cutting materials. |
Tips for Successful Installation
- Always read the manufacturer’s instructions before starting. I can’t stress this enough!
- Ensure that you have all tools ready before beginning your project.
- Take your time measuring and leveling for a professional finish.
- If you’re uncertain about your ability to drill into walls, consider hiring a professional.
For more insights on creative solutions like hanging curtains without drilling1, check out our extensive guide.
Hanging curtain rods can be a straightforward DIY project with the right tools and preparation. By gathering all necessary items before starting and considering potential complications based on your space’s layout, you’re setting yourself up for success. So go ahead, let’s make those windows shine!
A measuring tape is unnecessary for hanging curtain rods.False
This claim is false; a measuring tape is essential for accurate placement of curtain rods.
Wall anchors are needed for heavy curtains installation.True
This claim is true; wall anchors provide extra support for heavy curtains to prevent rod pull-out.
How Do I Measure for the Perfect Curtain Rod Placement?
Getting the curtain rod placement just right can transform any room into a cozy haven. Let me walk you through my journey of nailing that perfect setup!
To measure for perfect curtain rod placement, consider mounting rods 4-6 inches above the window frame and extending them 4-12 inches beyond the width of the window for a fuller effect.
Understanding the Basics of Curtain Rod Placement
To achieve an aesthetically pleasing look with your curtains, it’s crucial to understand the fundamental aspects of curtain rod placement. The ideal height and width for your rod can dramatically affect the perception of your space. Generally, a good rule of thumb is to hang the rod 4-6 inches above the window frame. This creates an illusion of taller ceilings and a more spacious room.
Measuring for Height
When measuring the height for your curtain rod, consider the following:
- Standard Height: Typically, rods are placed around 84 inches from the floor for floor-length curtains.
- Ceiling Mounting: If you want to give a more modern touch, consider mounting the rod close to the ceiling, which can be beneficial for smaller rooms.
- Custom Heights: Adjust based on the type of curtains you have; for example, if you are using cafe curtains, a lower rod might be appropriate.
Quick Reference Table for Rod Height Measurements
| Curtain Type | Recommended Rod Height |
|---|---|
| Floor-Length | 84 inches |
| Sill Length | Just above window sill |
| Café Curtains | 30-40 inches |
| Valances | Just above window frame |
Measuring for Width
Width measurement is equally important. The rod should extend beyond the window frame to allow for full curtain opening, ensuring maximum light and view. Here’s how you can measure:
- Width of Window: Measure the total width of your window.
- Add Extra Width: For a fuller look, add 4-12 inches on either side of the window. This allows curtains to be drawn back without blocking light.
Example Calculation
If your window is 36 inches wide:
- Add 8 inches (4 inches on each side): 36 + 8 = 44 inches.
- Therefore, your curtain rod should be at least 44 inches wide.
Avoiding Common Mistakes
It’s easy to make mistakes when measuring for curtain rod placement. Here are some tips to avoid pitfalls:
- Double Check Measurements: Always measure twice before cutting or purchasing.
- Consider Curtain Length: Make sure to account for any pooling or specific lengths desired.
- Use a Level: Ensure that the rod is straight when installing; this will enhance the overall look.
For more tips on perfecting your curtain rod installation, check out our detailed guide here2.
Conclusion of the Process
In conclusion, precise measurements will lead to an elegant and functional curtain setup. Remember, each space is unique, so adjust these guidelines as necessary to fit your specific needs. For additional insights on types of curtain rods and their aesthetic applications, see our full breakdown here.
Curtain rods should be hung 4-6 inches above the window frame.True
Hanging curtain rods 4-6 inches above the window enhances the illusion of taller ceilings and a spacious room.
A rod width should equal the window width for best results.False
For optimal light and view, curtain rods should extend 4-12 inches beyond the window's width.
What Are Common Mistakes to Avoid When Installing Curtain Rods?
Installing curtain rods might look easy at first glance, but I’ve learned that a few common missteps can really throw a wrench in your plans. Let me share some insights on what to avoid to make your installation a breeze.
**Common mistakes when installing curtain rods include incorrect height placement, misaligned brackets, choosing inadequate rod strength, and ignoring aesthetic appeal. Following best practices can enhance both functionality and design in your space. Here’s how to avoid these mishaps!
Choosing the Wrong Height
One of the blunders I frequently see—and one I fell victim to myself—is not considering the height at which to install the curtain rod. I remember when I first hung my living room curtains too low, and they made my ceilings feel like they were caving in! Ideally, curtains should be hung high to create the illusion of taller ceilings. A good rule of thumb is to hang rods about 4-6 inches above the window frame.
For a more dramatic effect, consider installing rods close to the ceiling. It not only enhances visual height but also lets in more light, brightening up the room!
To visualize this:
Trust me, this little adjustment can dramatically change the ambiance of your space. If you’re curious about more tips on height adjustments, check out this guide.
Incorrect Bracket Placement
Another mistake I made early on was misplacing brackets. Let me tell you, proper bracket placement is crucial for stability and support. Brackets should be positioned at least 3 inches from the window frame and spaced evenly to effectively distribute weight.
I learned quickly that using a stud finder can help ensure that brackets are anchored securely. Here’s a simple way to visualize proper bracket placement:
Misalignment can lead to drooping or sagging, which definitely diminishes the aesthetic appeal. For a deeper dive into bracket placement, learn more here.
Overlooking Curtain Weight
I remember being so enamored with a set of heavy velvet drapes that I didn’t consider whether my rod could handle them. Choosing curtains that are too heavy for your rod can lead to some frustrating problems! It’s essential to match curtain weight with a suitable rod; heavy drapes require sturdier rods while lighter fabrics can hang on standard ones.
Here’s a quick reference table for curtain weights:
Using an unsuitable rod can result in bending or even breaking—trust me, it’s not pretty! For more detailed information on curtain weights, visit this resource.
Ignoring Style and Functionality
Lastly, many people overlook the importance of aligning style with functionality, myself included! The rod style should complement both your curtains and your room’s decor. Plus, think about functionality—do you need a traverse rod for easy opening and closing?
Here’s a quick comparison of different rod styles:
Choosing the right style will not only enhance the appearance but also boost usability in your space. Want to explore more about styles? Check out here.**
When I first attempted to hang curtain rods in my living room, I was so excited to transform the space that I rushed through it. I thought, "How hard can it be?" But let me tell you, I learned the hard way about a few pitfalls that can really derail your efforts. So grab a cup of coffee, and let’s dive into some of the most common mistakes I’ve seen (and made) when installing curtain rods!
Choosing the Wrong Height
One of the most common mistakes is not considering the height at which to install the curtain rod. Curtains should ideally be hung high to create the illusion of taller ceilings. A good rule of thumb is to hang rods about 4-6 inches above the window frame.
For a more dramatic effect, consider installing rods close to the ceiling. This not only enhances the visual height but also allows for more light to enter the room.
| To visualize this: | Window Height | Rod Height Recommendation |
|---|---|---|
| 36 inches | 40-42 inches | |
| 60 inches | 64-66 inches | |
| 84 inches | 88-90 inches |
This consideration can greatly affect the overall ambiance of your space. For more tips on height adjustments, check out this guide3.
Incorrect Bracket Placement
Another frequent mistake is misplacing brackets. Proper bracket placement is crucial for stability and support. Brackets should be positioned at least 3 inches from the window frame and spaced evenly to distribute weight effectively.
Utilizing a stud finder can help ensure that brackets are anchored securely. Here’s how you can visualize proper bracket placement:
| Bracket Type | Recommended Distance from Wall | Notes |
|---|---|---|
| Single Bracket | 3-4 inches | Use for lightweight rods |
| Double Bracket | 5-6 inches | Ideal for heavier curtains |
Misalignment may lead to drooping or sagging, diminishing the aesthetic appeal. Learn more about bracket placement here4.
Overlooking Curtain Weight
Choosing curtains that are too heavy for the rod can lead to problems. It’s essential to match the curtain weight with a suitable rod. Heavy drapes require a sturdier rod, while lighter fabrics can be hung on standard rods.
Here’s a quick reference table for curtain weights:
| Curtain Fabric Type | Recommended Rod Type | Max Weight Capacity |
|---|---|---|
| Sheer | Lightweight | Up to 5 lbs |
| Cotton | Medium | Up to 10 lbs |
| Velvet | Heavy Duty | Up to 20 lbs |
Using an unsuitable rod can result in bending or even breaking. For a more in-depth exploration of curtain weights, visit this resource5.
Ignoring Style and Functionality
Lastly, many overlook the importance of aligning style with functionality. The rod style should complement both the curtains and the room’s decor. Additionally, consider functionality; do you need a traverse rod for opening and closing?
Here’s a quick comparison of different rod styles:
| Rod Style | Best For | Functionality Features |
|---|---|---|
| Decorative Rods | Aesthetic appeal | Fixed or adjustable length |
| Traverse Rods | Ease of use | Can be drawn open/closed easily |
| Tension Rods | Lightweight curtains | No drilling required |
Choosing the right style will enhance both the appearance and usability of your curtains. Explore more about styles here6.
Curtain rods should be hung at least 4-6 inches above windows.True
Hanging curtain rods higher creates the illusion of taller ceilings, enhancing room ambiance.
Using lightweight rods for heavy curtains is advisable.False
Lightweight rods cannot support heavy curtains, risking bending or breaking during use.
How Can I Choose the Right Style of Curtain Rod for My Decor?
Choosing the perfect curtain rod can feel overwhelming, but it’s an essential step in showcasing your home’s personality. Let’s dive into the heart of what makes a curtain rod not just functional, but a vital part of your decor!
To choose the right style of curtain rod, identify your decor style first—whether it’s rustic or modern. Then consider materials and colors that match your theme, ensure proper sizing for functionality, and coordinate with other room elements for a harmonious look.
Choosing the right style of curtain rod for your decor can significantly enhance your interior design. Let’s explore some key considerations:
Understand Your Decor Style
Before selecting a curtain rod, it’s essential to identify your decor style.
Is it minimalist, traditional, or perhaps a modern twist on classic designs?
Understanding your overall aesthetic will guide your choice in terms of materials and finishes.
For instance, if you have a rustic theme, consider a wooden rod with earthy tones.
On the other hand, sleek metal rods suit contemporary spaces well.
Material Matters
Different materials evoke different feelings and styles. Here’s a quick comparison table:
| Material | Style | Pros | Cons |
|---|---|---|---|
| Wood | Rustic, Traditional | Warm, natural look | Can warp in humidity |
| Metal | Modern, Industrial | Durable, sleek | Can be cold or harsh |
| Composite | Versatile | Affordable, various styles | Less durable than metal |
Choosing the right material can influence the overall ambiance of your space. For a minimalist approach7, opt for simple metal rods with clean lines.
Size and Functionality
Measuring correctly is vital. The curtain rod should extend beyond the window frame to ensure full coverage when the curtains are drawn back. Here’s a simple formula:
- Width: Window width + 10-20 inches (for overlap)
- Height: Hang the rod about 4-6 inches above the window frame for optimal effect.
Coordinating with Accessories
The curtain rod should complement other elements in the room, such as light fixtures and furniture. Consider the following:
- Color Coordination: Match the rod color with nearby accessories. A gold rod pairs well with warm-toned decor.
- Style Harmony: Ensure that the rod style complements other design elements. A vintage rod works beautifully with antique furnishings.
For more on color theory8 and how it applies to home decor, check our detailed guide!
Trending Styles
Current trends can influence your choice of curtain rods. Some popular styles include:
- Industrial Metal Rods – Perfect for urban lofts and modern spaces.
- Natural Wood Rods – Great for bringing warmth into any room.
- Decorative Finials – Adds a unique touch and showcases personal style.
Explore trending ideas at current trends9 to get inspired!
By considering these aspects carefully, I was able to choose a curtain rod that not only served its purpose but also enhanced my overall decor aesthetic.
Choosing the right curtain rod enhances interior design.True
The style and material of a curtain rod can significantly affect the overall aesthetic of a room, making it crucial for decor enhancement.
Metal curtain rods are ideal for rustic decor styles.False
Metal rods typically suit modern or industrial styles better than rustic themes, which prefer wooden materials for warmth.
Conclusion
Learn essential tips for successfully hanging curtain rods, including measurement techniques, tool requirements, common pitfalls to avoid, and style selection to elevate your home decor.
-
Discover various methods and tools to simplify your curtain rod installation process effectively. ↩
-
This link provides detailed guidance and visual aids to ensure accurate measurements, enhancing your curtain installation experience. ↩
-
This link provides valuable insights on proper installation techniques that ensure durability and style in your home. ↩
-
Explore this resource for expert tips on bracket placements and avoiding common pitfalls in installation. ↩
-
Learn about matching curtain weight with appropriate rods to avoid sagging or breakage in your installations. ↩
-
This guide will help you find the right style of curtain rods that complement your decor while serving their function effectively. ↩
-
This link will provide you with insights on the latest trends in curtain rod styles, helping you stay updated while making your selection. ↩
-
Learn about color theory in decor, which can guide you in selecting complementary curtain rod colors for your space. ↩
-
Discover trending ideas and inspiration for choosing curtain rods that enhance your home decor effectively. ↩






