
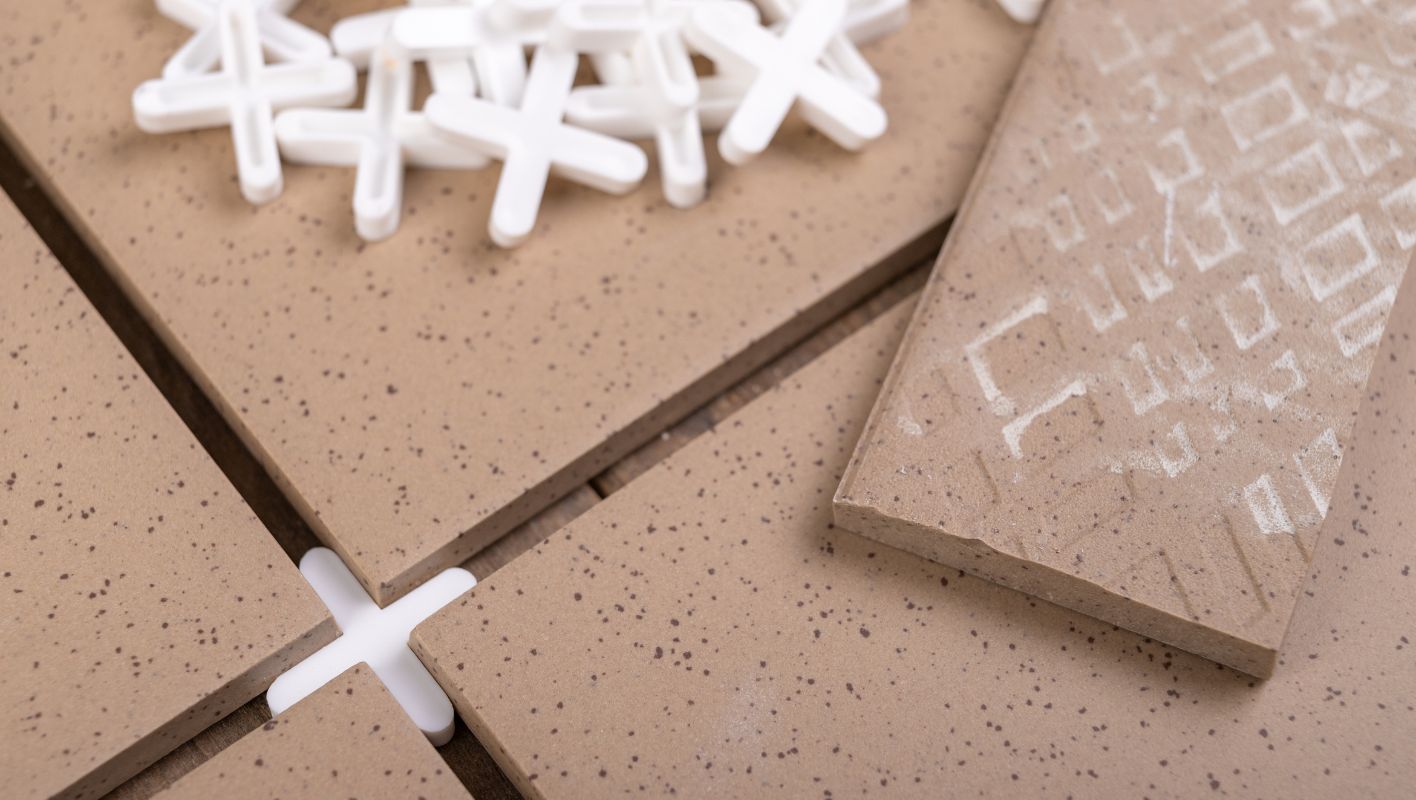
Ever wonder why those little tile spacers are a big deal in tiling?
Tile spacers create uniform gaps between tiles, essential for even grout lines and structural stability. They maintain alignment, prevent tile movement during installation, and ensure a polished, professional finish. Using tile spacers properly boosts both the aesthetics and durability of tiled surfaces.
I remember the first time I took on a tiling project at home. I thought, "How hard can it be? Just slap some tiles on the wall!" But soon I realized the importance of those tiny, unassuming tile spacers. They’re not just plastic bits to toss aside; they’re the unsung heroes of any tiling job.
Tile spacers help keep everything in line—literally! They ensure that each tile is perfectly spaced from its neighbor, making sure those grout lines are as even as a ruler. Without them, tiles might shift slightly during the installation process, leading to misalignment and a less-than-professional appearance. Plus, they play a crucial role in the longevity of your tiled surface by supporting structural stability.
In different settings like showers, kitchens, or bathroom floors, the size of the spacer can vary to suit the specific requirements of each area. Picking the right spacer is like choosing the right tool for the job—it can make all the difference. So next time you’re faced with a tiling task, remember to appreciate those little spacers for their big impact!
Tile spacers prevent tile movement during installation.True
Tile spacers hold tiles in place, ensuring they don't shift.
Using tile spacers is optional for structural stability.False
Spacers are essential for maintaining even grout lines and stability.
How Do Tile Spacers Contribute to Tile Installation Quality?
Ever felt the frustration of uneven tiles messing up your perfect DIY project? Tile spacers might just be your new best friend! Discover their magic in transforming tile installations from amateur to professional.
Tile spacers are essential for maintaining uniform gaps between tiles, which is crucial for proper grout application and alignment. They help achieve a professional finish, prevent uneven spacing, and reduce the risk of tiles moving or cracking.
The Role of Tile Spacers in Achieving Perfect Alignment
I remember the first time I tackled a tiling project in my own home. I was eager but a bit overwhelmed by the thought of keeping everything perfectly straight. That’s when I discovered the unsung hero of tile work: tile spacers. These small, simple tools quickly became indispensable, making sure every tile was perfectly aligned with the next. Without them, my kitchen floor would have been a patchwork disaster!
Tile spacers are crucial because they ensure uniform spacing throughout the project. This consistency is key for applying grout evenly1 and maintaining alignment. Trust me, without spacers, you’ll end up with some tiles closer together and others farther apart—a surefire way to end up with a less-than-professional look.
Reducing Tile Movement and Cracking
I’ve seen what happens when tiles aren’t properly spaced—cracks, loose tiles, you name it. This is where spacers really show their worth. They provide room for grout to expand and contract, which minimizes movement and prevents cracking over time. These little pieces of plastic (or rubber) act like a buffer against potential damage, ensuring your hard work lasts.
A table demonstrating common spacer sizes can further clarify their impact:
| Spacer Size (mm) | Application Area |
|---|---|
| 2 | Wall tiles |
| 3 | Standard floor tiles |
| 5 | Larger or outdoor tiles |
Enhancing Precision and Speed
One thing I love about using spacers is how they speed up the whole process. Once you set your spacers in place, everything just falls into line, literally! There’s less time spent on adjustments, which is a massive time-saver, especially on larger projects. For those just starting out with tile installation, understanding proper spacer use2 is vital. Trust me, a bit of practice and you’ll be laying tiles like a pro.
Choosing the Right Spacer Material
Selecting the right spacer material is another piece of the puzzle. I’ve tried various types over the years—plastic, rubber, even some eco-friendly options. Plastic spacers are my go-to for their affordability and ease of use. But if you’re environmentally conscious, there are plenty of eco-friendly packaging3 options available that align with sustainability trends.
In the end, tile spacers aren’t just about maintaining aesthetics; they’re about creating a reliable foundation for your tiling projects. Whether you’re a seasoned pro or a weekend warrior like I once was, understanding their role can make all the difference.
Tile spacers prevent uneven tile spacing.True
Spacers ensure uniform gaps between tiles, crucial for alignment.
Using spacers increases tile installation time significantly.False
Spacers enhance precision and speed up the installation process.
Can You Tile Without Using Spacers?
Tiling without spacers? I’ve been there, balancing the thrill of a seamless look against the fear of misalignment. It’s like walking a tightrope without a net!
Tiling without spacers is indeed possible, but it demands an eagle eye for detail and a steady hand. While laser levels or seasoned skills can help keep tiles aligned, the process is fraught with risks like uneven grout lines.
Understanding the Role of Tile Spacers
When I first tried tiling without spacers, I quickly realized why these little tools are so valued. Tile spacers ensure uniform gaps, keeping everything in perfect harmony and preventing tiles from shifting—something that can easily lead to misalignment if you’re not careful and misalignment4.
Advantages of Tiling Without Spacers
- Seamless Look: I can’t deny the allure of a smooth, uninterrupted tile surface where grout lines are barely visible.
- Faster Installation: Without the fuss of placing spacers, the process can fly by. Less setup means more time to enjoy that new floor!
- Reduced Material Use: With less grout to mix and apply, it can be a more economical option.
Challenges and Considerations
- Precision is Key: Believe me, precision becomes your best friend when you forgo spacers. Even the slightest slip can result in those pesky gaps.
- Professional Skill Level: I’d only recommend this for those with steady hands and nerves of steel—experienced tilers who can eyeball it perfectly.
- Potential for Grout Cracking: Be mindful; without spacers, pressure changes might cause your grout to crack.
Techniques to Consider
- Laser Levels: These have been a game-changer for me in maintaining straight lines and avoiding the dreaded crooked tile effect.
- Adjustable Tile Clips: Acting as temporary spacers, these are a nifty alternative to consider to maintain alignment5.
| Technique | Benefits | Drawbacks |
|---|---|---|
| Laser Level | Ensures straight lines | Requires initial setup |
| Adjustable Clips | Provides temporary support | May leave slight residue |
Taking the plunge into tiling without spacers requires weighing those sleek aesthetics against the potential pitfalls. The minimalist vibe is tempting, but it calls for a masterful touch to avoid issues like misalignment and cracking. Maybe checking out professional advice6 or case studies7 could offer further guidance tailored to your specific project.
Tile spacers are essential for even grout lines.True
Spacers help maintain uniform gaps, preventing tile misalignment.
Tiling without spacers is faster and risk-free.False
While faster, it risks misalignment and grout cracking without spacers.
What Are the Different Types of Tile Spacers Available?
I remember the first time I took on a tiling project; it felt like a daunting puzzle.
Tile spacers are essential tools that help maintain even gaps between tiles, ensuring a professional finish. These small plastic devices come in T-shaped, cross-shaped, horseshoe, and wedge forms, each catering to specific tiling needs and helping achieve precise alignment and a flawless look.
I remember the first time I took on a tiling project; it felt like a daunting puzzle. I wanted everything to be perfect, right down to the grout lines. That’s when I discovered the magic of tile spacers.
T-Shaped Tile Spacers
When I was working with subway tiles for my kitchen backsplash, T-shaped spacers became my best friend. Their versatility helped me nail those staggered patterns and tricky corners without breaking a sweat.
Cross-Shaped Tile Spacers
For my bathroom floor, cross-shaped spacers were indispensable. Their "plus" design ensured every tile aligned perfectly, transforming the room into a seamless grid of elegance.
| Type | Ideal Use | Notable Feature |
|---|---|---|
| T-Shaped | Staggered patterns | Flexible in use |
| Cross-Shaped | Uniform grid patterns | Multi-directional alignment |
Horseshoe Tile Spacers
When it came to heavier tiles in my living room, horseshoe spacers were lifesavers. Their U-shape made them easy to adjust and perfect for leveling out thicker tiles.
Wedge Tile Spacers
I’ve found wedge spacers particularly useful when working with large format tiles. They’re perfect for adjustable spacing and work wonders with tile leveling systems8 to avoid lippage.
Tile leveling systems9 are a game-changer, maintaining even surfaces and preventing common pitfalls in tiling.
Each type of tile spacer comes with its own set of benefits. Selecting the right one can feel overwhelming, but understanding your project’s requirements—like the pattern you’re after or the tile size—can make all the difference. With these insights, choosing the right tools becomes not just a task but a step toward crafting something beautiful.
Choosing tile spacers isn’t just about aesthetics; it’s about ensuring the longevity of your installation. Properly selected spacers play a crucial role in the durability of your project.
So, whether you’re diving into a new project or refining an old one, take the time to explore different tile spacer options. With the right knowledge and tools, achieving a flawless tiled surface is not only possible but also immensely satisfying.
T-shaped spacers are ideal for subway tiles.True
T-shaped spacers offer flexibility in staggered patterns, common in subway tile setups.
Cross-shaped spacers are unsuitable for large tiles.False
Cross-shaped spacers ensure perfect alignment, making them suitable for large tile installations.
How to Choose the Right Size Tile Spacer for Your Project?
Ever found yourself staring at a pile of tiles, wondering how those tiny spacers can make such a big difference? Let’s crack the code on tile spacers together.
Choosing the right tile spacer size is crucial for even grout lines and a polished finish. Generally, 1/16 to 3/16 inch spacers work for most tiles, but larger tiles might need larger spacers. Factors like tile type, pattern, and personal preference play a key role in this decision.
Understanding Tile Spacers
I remember when I first tackled a tiling project. Those little plastic pieces seemed so insignificant, yet they were the key to making my tiles look like they’d been laid by a pro. Tile spacers are essential for keeping your tiles aligned and your grout lines uniform, which can make or break the aesthetic and structural integrity of your tiling project.
Factors to Consider
-
Tile Type
- Ceramic Tiles: For these, I often reach for 1/16 to 1/8 inch spacers. They seem to give that crisp, clean look I love.
- Stone Tiles: I’ve learned these need more room to breathe due to natural variations. Larger spacers, like 1/8 to 3/16 inch, are usually my go-to.
- Porcelain Tiles: They’re similar to ceramic, but for thicker ones, sometimes a bit more space—around 1/8 inch—works best.
-
Tile Pattern
- Straight Lay: When I want tight grout lines and a seamless look, smaller spacers are my choice.
- Diagonal or Brick: These patterns can be tricky, so I often use larger spacers for clarity and balance.
-
Aesthetic Preferences
- I love how smaller spacers can create a sleek, almost continuous look, while larger ones make the grout lines pop, becoming a feature in themselves.
Practical Application
Consider using this table for quick reference:
| Tile Type | Recommended Spacer Size |
|---|---|
| Ceramic | 1/16 – 1/8 inch |
| Stone | 1/8 – 3/16 inch |
| Porcelain | 1/16 – 1/8 inch |
For more insights, check out our tile pattern guide10, which can be a lifesaver when you’re deciding on the perfect spacer size.
Professional Tips
- Always peek at the manufacturer’s recommendations; they often have specific guidance that can save you headaches later.
- A dry layout is something I swear by—it helps me visualize the final look and make necessary adjustments before the adhesive comes into play.
- For large-format tiles, leveling systems11 are indispensable in my toolkit to prevent lippage.
Common Mistakes to Avoid
I’ve had my fair share of mishaps:
- Incorrect Size Selection: Picking the wrong size has left me with uneven lines that haunt my dreams.
- Skipping Dry Layout: It’s tempting to skip, but I’ve learned the hard way that it can lead to misaligned tiles.
- Ignoring Manufacturer Instructions: Each tile can be unique; missing these details can lead to unforeseen problems.
Tools and Techniques
Using the right tools has been game-changing for me. Things like tile cutters12 and grout floats13 ensure precision in every project. Remember, choosing the correct spacer size is crucial—it sets the stage for everything else. Happy tiling!
Ceramic tiles always require 1/4 inch spacers.False
Ceramic tiles typically use 1/16 to 1/8 inch spacers, not 1/4 inch.
Skipping dry layout can cause tile misalignment.True
A dry layout helps visualize spacing and prevents alignment issues.
Conclusion
Tile spacers are essential for maintaining uniform gaps between tiles, ensuring even grout lines, structural stability, and a professional finish in tiling projects.
-
This link provides techniques for applying grout effectively, ensuring a professional finish with proper tile spacing. ↩
-
Explore beginner-friendly guides on how to correctly use tile spacers for an optimal installation process. ↩
-
Discover sustainable tile spacer materials that align with eco-friendly building practices. ↩
-
Understanding the importance of tile spacers helps in evaluating their necessity during installation. ↩
-
Learn how adjustable tile clips can temporarily replace traditional spacers for better alignment. ↩
-
Gain expert insights to better understand the pros and cons of this method. ↩
-
Explore real-life examples to see how this technique has been applied successfully. ↩
-
Discover how tile leveling systems enhance precision by preventing lippage and ensuring smooth surfaces during installation. ↩
-
Discover how tile leveling systems enhance precision by preventing lippage and ensuring smooth surfaces during installation. ↩
-
Explore popular tile patterns and their benefits in different settings. ↩
-
Learn how leveling systems help achieve flat and even tile surfaces. ↩
-
Find out how to select a tile cutter that suits your project needs. ↩
-
Discover how a grout float aids in applying grout effectively. ↩






