
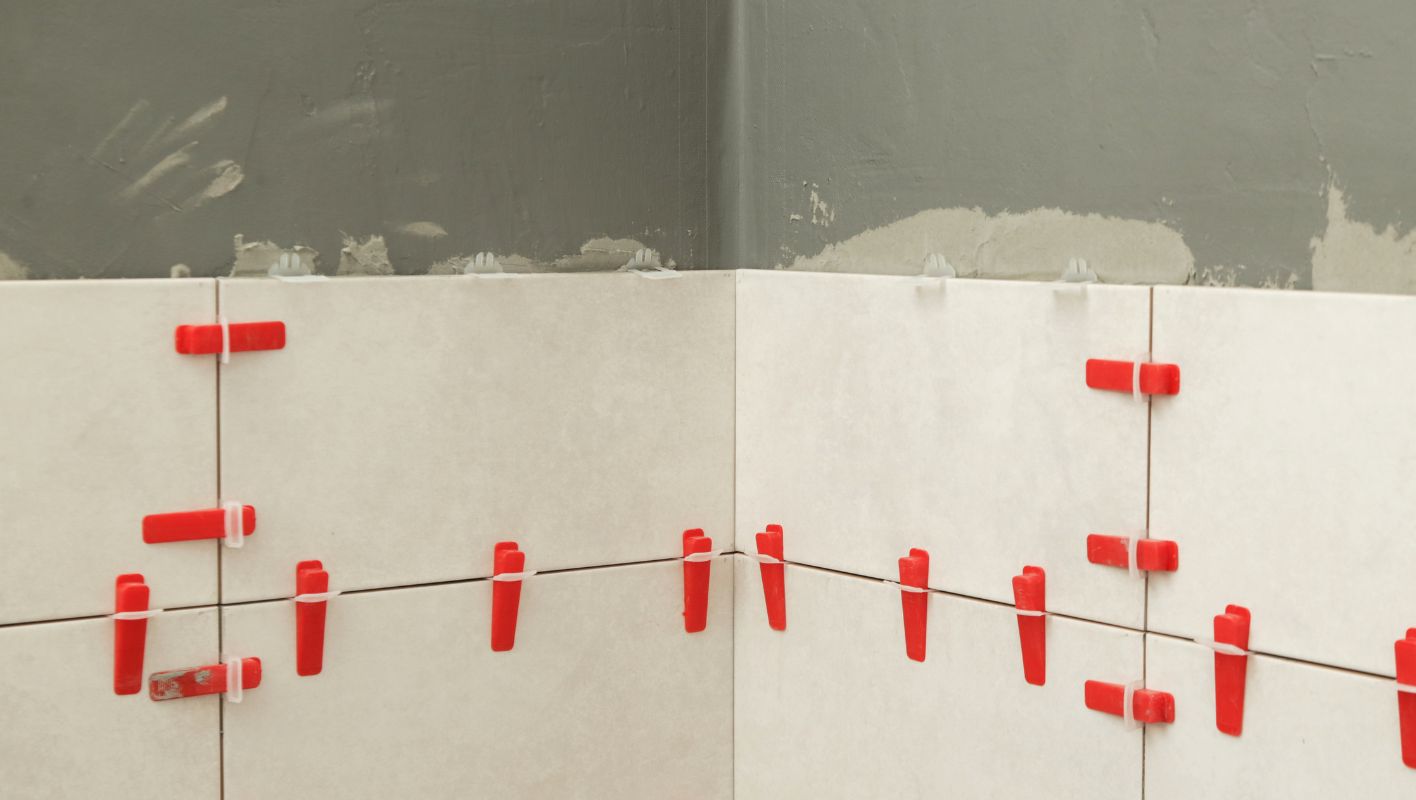
Imagine tackling a wall tiling project and achieving a seamless, professional finish without the usual headaches.
Using a tile leveling system is your secret weapon against lippage, ensuring your wall tiles are perfectly aligned and secure. By placing spacers and tightening clips between tiles, you create a smooth, even surface that’s not only visually stunning but also structurally reliable.
I remember the first time I faced a tiling challenge—my heart raced as I envisioned uneven tiles mocking my efforts. Thankfully, with the right tile leveling system, those fears vanished. Stick around as I share insights from that journey: expert tips, pitfalls to dodge, and a detailed walkthrough for your wall tiling success.
Tile leveling systems prevent tile lippage.True
These systems ensure tiles are aligned evenly, preventing uneven edges.
Using spacers and clips guarantees a level surface.True
Spacers and clips hold tiles in place, maintaining a smooth alignment.
What Are the Key Components of a Tile Leveling System?
Ever stared at a freshly tiled floor and wished yours looked just as flawless?
A tile leveling system’s key components are leveling clips, wedges or caps, and pliers, all working together to ensure your tiles are perfectly even and spaced.
I remember the first time I tried my hand at tiling. Let’s just say it didn’t turn out exactly like those glossy magazine photos I had been inspired by. There was a constant battle with uneven surfaces, and I had no idea how much frustration lippage could cause until I saw it firsthand. That’s when I discovered the magic of a tile leveling system.
Leveling Clips
Think of leveling clips as the unsung heroes of your tiling project. They’re small but mighty, making sure those pesky gaps between tiles don’t become eyesores. These clips act as the foundation of any tile leveling system1, slipping under each tile to maintain an even surface and consistent joint width. Crafted from durable yet breakable plastic, they make clean-up a breeze once the adhesive dries.
- Material: I love that most clips are eco-friendly, made from recyclable plastic.
- Sizes: They come in various sizes to match different tile thicknesses.
| Clip Size | Tile Thickness Range |
|---|---|
| Small | 1/8" to 1/4" |
| Medium | 1/4" to 1/2" |
| Large | 1/2" to 3/4" |
Wedges and Caps
Wedges and caps—choosing between these is like deciding between coffee or tea; it often comes down to personal preference. In my experience, wedges are fantastic for exerting pressure and holding the tiles in place, plus they’re reusable! But some folks swear by caps for their ability to apply a more uniform force.
- Wedges: Slide into the clips for an even surface. Cost-effective and reusable.
- Caps: Sit atop tiles and clips, offering uniform pressure.
The choice can affect the final look of your work, so weighing the pros and cons is essential.
Pliers
Pliers may not be mandatory, but they sure do make life easier. They help apply consistent pressure on the wedges or caps, aligning each tile perfectly. When I first used pliers, I marveled at how much more professional my work looked.
- Functionality: They speed up installation and improve accuracy.
- Adjustability: Many feature adjustable tension settings for different tiles.
Choosing the right pliers2 can make all the difference in your tiling project. Trust me; once you get the hang of these tools, achieving that flawless finish becomes second nature.
Leveling clips prevent tile lippage.True
Leveling clips maintain consistent joint width, preventing uneven tiles.
Caps are reusable like wedges in tile leveling systems.False
Caps are not typically reusable, unlike wedges which are reusable.
How do you prepare a wall for tile installation?
You know, getting a wall ready for tiles is like setting the stage for a big performance. It needs the right prep to make sure everything shines.
To prepare your wall for tile installation, start by cleaning it thoroughly, repair any damage, and ensure the surface is level. Apply a primer or sealer on porous surfaces to improve adhesion and ensure your tiles stay in place for the long haul.
Step 1: Assess the Surface Condition
First things first, I took a good look at the wall. Just like checking under the hood before a road trip, I needed to identify any cracks or uneven spots. These little imperfections can be real troublemakers if left unchecked. So, I grabbed some spackle and got to work smoothing things out.
Step 2: Clean the Wall Thoroughly
Next up was cleaning. I remember thinking of it as giving the wall a nice bubble bath with a mild detergent solution. It’s amazing how much grime can accumulate! If there was any old wallpaper or peeling paint, it had to go. This step really makes a difference in how well those tiles stick.
Step 3: Level the Surface
Then came leveling. I once tried skipping this step, thinking I could eyeball it—big mistake! A spirit level became my best friend here. Any low spots got filled in with patching compound, and for bigger unevenness, I used a skim coat of mortar.
| Surface Type | Preparation Needed |
|---|---|
| Drywall | Prime with drywall sealer |
| Painted walls | Sand lightly, then clean |
| Existing tiles | Roughen with sandpaper for grip |
Step 4: Prime or Seal the Wall
Priming was essential on my drywall to keep moisture out and improve tile adhesion. I learned this the hard way after seeing some tiles start to peel because I skipped sealing porous surfaces. For porous surfaces3, using a sealer can add extra protection.
Step 5: Gather Your Tools and Materials
Finally, gathering tools beforehand saved me countless trips back and forth to the hardware store. With tile spacers, a notched trowel, adhesive, and grout all within reach, I felt like a pro.
Explore more about tile adhesives4 to understand which works best for your specific project needs.
For anyone diving into this kind of project, I can’t stress enough how crucial each of these steps is to achieving a result you’ll be proud of. And if things get too complex, reaching out to an expert can be a real game-changer.
Priming is not needed for drywall before tiling.False
Priming drywall prevents moisture absorption and enhances tile adhesion.
Uneven walls can lead to a messy tile job.True
Uneven surfaces cause tiles to misalign, affecting the finish quality.
What are common mistakes to avoid when using a tile leveling system?
When I first tackled tile leveling, I learned the hard way that a flawless finish is all about avoiding common missteps. Let me share what I’ve discovered so you can sidestep frustration.
Using too few spacers, hurrying the leveling process, and neglecting substrate preparation are common tile leveling system mistakes. Properly preparing your tools and surface is key to a smooth tile installation.
Insufficient Use of Spacers
I remember the first time I laid tiles in my bathroom—what a learning curve! I thought I was saving time by skimping on spacers, only to find that my beautiful pattern was shifting as the adhesive set. You really can’t have too many spacers; they keep those grout lines perfect and prevent tiles from wandering during the drying process5. Here’s a quick guide I wish I’d had:
| Tile Size | Recommended Spacer Count |
|---|---|
| 12×12 inch | 4 per tile |
| 24×24 inch | 6 per tile |
| Large Format | 8-10 per tile |
Rushing the Leveling Process
Patience is a virtue, especially with tile leveling. My impatience once led to uneven surfaces because I rushed through this step, thinking I could adjust things later. Trust me, taking your time here to make precise adjustments6 pays off with a smooth, even floor.
Ignoring Substrate Preparation
It’s tempting to jump right into laying those gorgeous tiles, but ignoring substrate preparation is a rookie mistake. I’ve learned that a clean, dry, and level base is essential for both the durability and appearance of your tiles. A well-prepped substrate supports your tile’s longevity7 and saves you headaches down the line.
Using Inadequate Tools
I once tried cutting corners with cheap tools—a decision that cost me time and quality. Investing in a reliable tile leveling system tailored to your tiles makes all the difference. Proper tools aren’t just for ease; they ensure a top-notch finish.
Tool Checklist:
- Rubber Mallet
- Tile Nippers
- Tile Spacers
- Leveling Wedges and Clips
Not Allowing for Adequate Curing Time
Patience strikes again! Eager to see the final result, I once pulled out the leveling system too soon, leading to tile shift and lippage. Always adhere to the manufacturer’s curing times8 for the best outcome.
Overlooking Safety Precautions
Lastly, don’t overlook safety! I never start without my gloves and goggles now after a close call with flying tile chips. Prioritizing safety keeps you accident-free and focused on the installation.
By avoiding these pitfalls, you’re on your way to mastering tile installation and achieving a finish that even professionals will admire.
Using fewer than 4 spacers for 12x12 tiles is sufficient.False
Using fewer than 4 spacers can lead to uneven grout lines.
Ignoring substrate preparation can cause tile unevenness.True
A poorly prepared substrate leads to an unstable tile surface.
How Do You Choose the Right Tile Leveling System for Your Project?
I remember the first time I tackled a tiling project; picking the right tile leveling system felt like a game-changer! It’s amazing how the right choice can transform your space with precision and style.
To choose the right tile leveling system, focus on tile size, thickness, and material compatibility. Evaluate ease of use, cost, and trusted brands to ensure a professional finish every time.
Understanding Tile Leveling Systems
If you’ve ever spent a weekend agonizing over uneven tiles, you’ll understand why tile leveling systems are a godsend. They make all the difference in achieving that flawless, flat surface we all aim for. I remember my own tiling adventure where lippage was a nightmare, and discovering these systems was like unlocking a secret to professional results.
Key Factors to Consider
- Tile Size and Thickness: Bigger tiles have their own challenges. If you’re dealing with tiles over 12 inches, a robust system is your best friend. I learned this the hard way when my living room tiles started looking like a patchwork quilt instead of a sleek surface.
- Material Compatibility: The material matters too. Porcelain and ceramic each have their quirks, so picking the right system can save you a lot of grief.
Evaluating Ease of Use
For those of us who enjoy the satisfaction of a DIY project9 (and maybe a bit of a challenge), ease of use is crucial. Systems that involve clip-and-wedge mechanisms are often straightforward, perfect for someone like me who appreciates clear instructions and a job well done.
Cost vs. Quality
We’ve all been there—tempted by budget options only to regret it later. Investing in reputable brands ensures durability and effectiveness. I once opted for a cheaper system for a friend’s project, and let’s just say we ended up redoing quite a bit of work!
| Feature | Clip System | Wedge System |
|---|---|---|
| Ease of Use | High | Moderate |
| Suitable Tile Size | Small | Large |
| Cost | Moderate | High |
Manufacturer Reputation
A little research goes a long way. Checking reviews or asking around for recommendations can be invaluable. Trusted brands10 often come with great support and warranty services that make life easier.
Exploring Innovative Options
Keeping an eye on industry trends has its perks. Self-leveling systems are gaining popularity for good reason—they’re efficient, especially for larger projects. I’ve started incorporating them into my projects and they’ve saved me time and stress.
By understanding these elements, you can choose the perfect tile leveling system that meets your needs and ensures your project turns out beautifully. Whether you’re a seasoned pro or just starting out, this guide will help you make an informed decision.
Larger tiles need wedge systems for better stability.True
Wedge systems provide more stability for tiles over 12 inches.
Clip systems are more expensive than wedge systems.False
Clip systems are generally less expensive than wedge systems.
Conclusion
Learn how to effectively use a tile leveling system for wall tiling, ensuring a seamless finish by preventing lippage and achieving perfect alignment with expert tips and essential tools.
-
Explore the basics of tile leveling systems to understand their purpose and benefits. ↩
-
Learn how selecting the right pliers can improve your tile installation process. ↩
-
Sealers protect porous surfaces from moisture and stains, improving tile adhesion. Find which sealer suits your wall type. ↩
-
Learn about various tile adhesives to ensure optimal performance and longevity for your tiling project. ↩
-
Discover why spacers are essential for consistent grout lines and preventing tile shifts. ↩
-
Learn techniques for effectively adjusting tiles to avoid an uneven surface. ↩
-
Explore methods for preparing your substrate to support long-lasting tile installations. ↩
-
Understand the necessary curing times to prevent shifting and ensure tile adhesion. ↩
-
Explore this link to find user-friendly tile leveling systems ideal for DIY enthusiasts, ensuring easy installation and professional results. ↩
-
Check out this link to discover leading manufacturers known for high-quality tile leveling systems and exceptional customer support. ↩






