
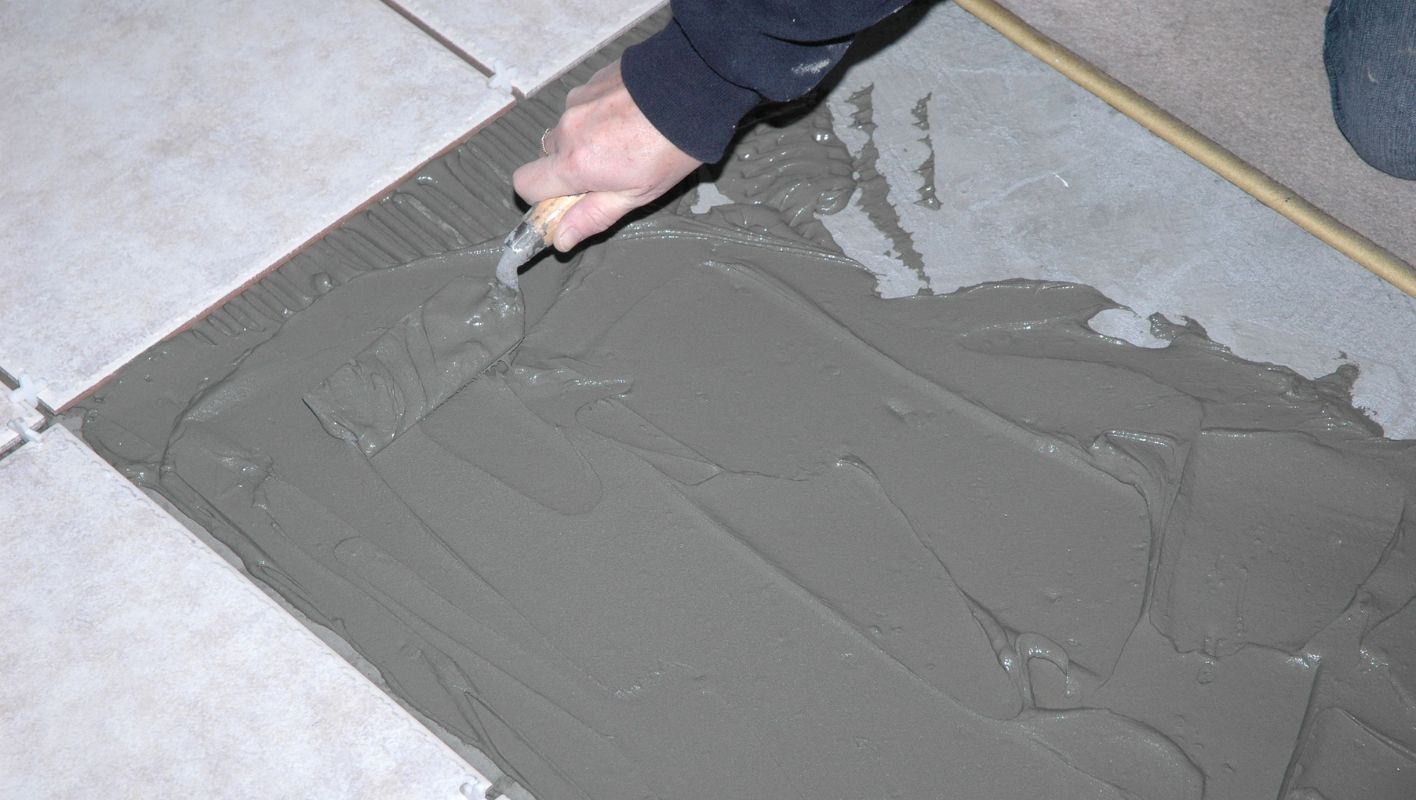
Thinking of giving your floors a fresh look without ripping everything out? Let me guide you!
Yes, you can lay tile over linoleum flooring, as long as the existing floor is in good condition and properly prepared. Start by thoroughly cleaning the surface, ensuring it’s level, and using the right adhesive to secure the tiles effectively.
The process might seem simple, but it’s all about the prep work! I remember when I decided to tackle this project myself. I was eager but a bit nervous about getting it right. Through trial and error, I learned that paying attention to the details really makes a difference. I’ll walk you through the essential steps, share insider tips, and point out common pitfalls to help you achieve a seamless flooring makeover. Let’s turn this DIY challenge into a success story!
Linoleum must be in good condition to tile over.True
Tiling requires a stable base; damaged linoleum compromises tile adhesion.
You can use any adhesive for tiling over linoleum.False
Only specific adhesives work well with linoleum; incorrect ones may fail.
How Do You Prepare for Tiling Over Linoleum?
Ready to transform your floors but not sure where to start? Tiling over linoleum might just be your game-changer. Let’s dive into making it a smooth and lasting upgrade.
Before diving into tiling over linoleum, ensure your floor is clean, level, and well-adhered. Use a good degreaser, patch any flaws, and apply a primer to boost tile adhesion.
Assessing the Current Floor Condition
First off, let’s get personal. I remember my first tiling project like it was yesterday. The anticipation, the excitement—only to be halted by peeling linoleum that seemed like it was stuck in the 70s. Before you start, make sure your linoleum is firmly glued down, with no bubbles or peeling edges. If you find any damage, you might need to replace those sections or even the whole surface. Grab a spirit level from your toolbox to check for evenness; trust me, it’s worth it.
Cleaning and Prepping the Surface
Cleaning feels like an epic battle sometimes, doesn’t it? I used a high-quality degreaser—one of those industrial-strength ones—to ensure no grease or grime would mess up my new tiles. After a good scrub, rinse thoroughly and let it dry completely. Once it’s dry, lightly sand the surface to rough it up a bit for better adhesion. Think of it as giving the tiles something to hold onto.
| Task | Description |
|---|---|
| Clean Surface | Use degreaser; rinse and dry thoroughly |
| Sanding | Lightly sand for better adhesive bonding |
| Check Adhesion | Ensure no loose areas; repair or replace if needed |
Priming for Success
Oh, the wonders of primer! It’s like magic in a can. Applying a primer helps those tiles stick better, especially on non-porous surfaces like linoleum. Look for a primer that’s specifically designed for tile over vinyl installations. Follow the instructions on the can—I once skipped reading them and learned my lesson the hard way.
Choosing the Right Tile and Adhesive
Choosing tiles is like picking out a new outfit; you want it to look good and last. Go for flexible adhesives that can handle slight movements in the linoleum base. Smaller tiles can be more forgiving of minor floor imperfections, so keep that in mind. If you’re unsure, consult with experts1 to pick out the best products for your specific situation.
Dry Run and Layout Planning
Here’s a pro tip: always do a dry run before committing with adhesive. Lay out your tiles to plan the design and cuts. This step helped me avoid awkward gaps and saved me from a lot of "oops" moments. Use spacers to keep grout lines even—it’s those little details that make all the difference. Check out professional guidelines2 if you need layout strategy tips.
By following these preparation steps and embracing thoughtful planning, your tiling project over linoleum can lead to gorgeous and durable results. Remember, taking shortcuts might save time now but ensuring your flooring remains beautiful for years is worth every extra effort.
Linoleum must be level before tiling over it.True
Uneven linoleum can cause tile misalignment and poor adhesion.
Primer is optional when tiling over linoleum.False
Primer enhances adhesion on non-porous surfaces like linoleum.
Which Adhesives Work Best for Tiling Over Linoleum?
Ever stood in your kitchen, staring at that linoleum floor, dreaming of a sleek tile upgrade without the hassle of ripping out the old stuff?
The best adhesives for tiling over linoleum include thin-set mortar, epoxy-based adhesives, and mastic. These options provide strong adhesion, flexibility, and moisture resistance necessary for successful tile installation over linoleum.
Understanding Adhesive Types
When I first considered tiling over my well-worn linoleum floor3, I realized choosing the right adhesive was like finding the perfect partner—one that sticks with you through thick and thin! Thin-set mortar, epoxy-based adhesives, and mastic all came highly recommended.
| Adhesive Type | Benefits | Considerations |
|---|---|---|
| Thin-set mortar | Strong bond, versatile | May require surface prep |
| Epoxy-based | Highly durable, moisture-resistant | Typically more expensive |
| Mastic | Easy application, quick setting | Less durable in wet areas |
I found thin-set mortar to be a favorite among professionals for its robust bond. But like any good relationship, it demands a bit of effort upfront—think cleaning and scuffing that linoleum to ensure everything holds tight.
Choosing the Right Adhesive for Your Project
1. Surface Preparation:
- From my own DIY adventures, I’ve learned that thin-set mortar shines when you give it a good foundation. A well-prepared surface4—scuffed linoleum—is key to preventing tile lift-off.
2. Moisture Resistance:
- If your tiling project is in a high-moisture area like a bathroom or kitchen, epoxy-based adhesives are your best friend. Their ability to resist water damage is a game-changer.
3. Ease of Application:
- When I was pressed for time on a smaller project, mastic was a lifesaver. It’s user-friendly and quick-setting, perfect for when speed is of the essence.
Evaluating Long-Term Implications
It’s always wise to think ahead. While thin-set mortar offers incredible adhesion, it can be a real challenge to remove if you decide to change up your flooring later on. Conversely, mastic might not stick around as long but could make future updates less of a headache.
The Role of Eco-friendly Adhesives
In my quest for sustainability, I discovered some eco-friendly adhesives that don’t skimp on performance. Exploring eco-friendly options5 not only aligns with my green goals but also ensures a quality installation.
Each adhesive has its own strengths and quirks. Taking time to weigh these factors will help you make the best decision for your unique tiling project over linoleum.
Thin-set mortar requires surface preparation for best results.True
Surface prep enhances adhesion, preventing tiles from lifting.
Mastic is the most durable adhesive for wet areas.False
Mastic is less durable in wet areas compared to epoxy adhesives.
What Are the Risks of Tiling Over Linoleum?
I remember the first time I thought about tiling over my old linoleum floor—it seemed like a simple shortcut. But as it turns out, the risks might just outweigh the convenience.
Tiling over linoleum can cause problems like weak adhesion, uneven surfaces, and trapped moisture, potentially leading to mold. Thoroughly assessing and prepping your linoleum is essential to avoid these issues.
Adhesion Problems
Let me share a little story. A friend of mine once tiled over linoleum, thinking it would save time. Fast forward a few months, and he noticed tiles shifting underfoot. The culprit? Poor adhesion. Linoleum’s smooth and non-porous surface doesn’t play well with tile adhesive, leading to unstable flooring. If you’re thinking about doing this, try testing the adhesive on a small patch first or opt for a bonding agent that’s up to the task.
| Potential Issue | Risk Level | Mitigation Strategy |
|---|---|---|
| Poor Adhesion | High | Test adhesive; use bonding agents |
Uneven Surfaces
I’ve walked into projects where floors felt like a mini-mountain range because the tiles were laid directly over uneven linoleum. It’s frustrating! Those imperfections from the old floor seep through, making things unsightly and even causing tiles to crack. To avoid this, consider using a leveling compound to smooth out those bumps before tiling.
You might want to explore suitable leveling compounds6 that are compatible with linoleum.
| Potential Issue | Risk Level | Mitigation Strategy |
|---|---|---|
| Uneven Surfaces | Medium | Apply leveling compound |
Moisture and Mold Concerns
One time, I discovered mold under a client’s new tile floor because they didn’t address the seams in their old linoleum. Moisture had sneaked in, and it was not pretty—or healthy. Protect yourself by using waterproof membranes to create a barrier against moisture.
Learn more about effective waterproofing techniques7 to keep your floor dry and safe.
| Potential Issue | Risk Level | Mitigation Strategy |
|---|---|---|
| Moisture/Mold Entrapment | High | Implement waterproof membranes |
Alternative Solutions
If all these risks sound daunting, maybe it’s best to remove the linoleum first. I’ve done this on a few occasions, and while it’s extra work, it guarantees a smooth start with no hidden surprises. To make this process easier, consider looking into removal tools8 that can save time and effort.
Additionally, considering professional assessment could save time and future costs by identifying potential pitfalls before they become real problems. Discover how professionals evaluate flooring conditions9 for more informed decisions.
Tiling over linoleum can cause poor adhesion of tiles.True
Linoleum's smooth surface makes it hard for adhesives to bond effectively.
Using waterproof membranes prevents mold under tiles.True
Waterproof membranes block moisture, reducing the risk of mold growth.
How does tiling over linoleum affect floor stability?
Ever stared at your linoleum floor and wondered if tiling over it could be the perfect facelift without ripping everything apart?
Tiling over linoleum affects floor stability based on the linoleum’s adherence and the subfloor’s condition. If both are in good shape, you’re in the clear! Just ensure proper preparation for best results.
Assessing Linoleum Condition
You know those times when you look at your floor and it’s like staring at an old friend who’s been through a lot? Well, that’s exactly how I felt about my linoleum before deciding to tile over it. The key here is to give it a good check-up. If it’s sticking tight with no bubbling or cracking—kind of like how I feel after a solid yoga session—then you’re in good shape to start tiling. But if there’s any damage, like that time I tried to fix my bike and ended up with more loose parts than I started with, it might be wise to repair or replace10 it first.
Subfloor Considerations
Thinking about the subfloor is like checking the foundation of your beliefs—if it’s shaky, everything falls apart. Before you lay down those tiles, make sure the subfloor is stable. I remember when I ignored a creaky floorboard only to have my dog find it during his high-speed chases. Don’t repeat my mistake; ensure there’s no water damage or warping.
| Subfloor Type | Suitability for Tiling Over Linoleum |
|---|---|
| Plywood | High if structurally sound |
| Concrete | High, especially if level and dry |
| Particle Board | Low, prone to moisture damage |
Installation Best Practices
When I first took on a DIY project, my best friend was YouTube tutorials. From them, I learned that using a quality thin-set mortar when laying tiles over linoleum is crucial. It’s kind of like using the right glue on a school project—it makes all the difference! And don’t skip out on a tile underlayment11; it’s your floor’s best friend in ensuring long-term stability.
Impact of Adhesive Choices
Choosing an adhesive felt a bit like picking the right pair of shoes for a long hike—flexibility is key. You want something that can handle a bit of movement without compromising integrity, especially if your home experiences temperature swings like mine does. A flexible adhesive is like that good friend who can roll with whatever comes their way.
Additional Factors to Consider
- Moisture Levels: Think of moisture as that unexpected rain shower during a picnic—it can really mess things up. Ensure proper sealing to keep everything dry.
- Weight Load: Remember that time I tried to balance too many groceries in one bag? Consider the weight your floor will bear; heavier loads might need extra support.
- Professional Consultation: Don’t shy away from asking for help. A flooring expert’s advice can be invaluable, just like calling my dad when I couldn’t figure out how to put furniture together.
Grasping these nuances ensures your linoleum-to-tile transformation doesn’t just look great but stands strong, too. With the right prep work, your floor will not only be a beauty but also the reliable base every home needs. Explore best practices12 further to enhance your project results.
Linoleum condition affects tile stability.True
Damaged linoleum can lead to instability; a sound base is crucial.
Particle board subfloors are ideal for tiling.False
Particle board is prone to moisture damage, making it unsuitable.
Conclusion
You can lay tile over linoleum if it’s in good condition. Proper preparation, including cleaning, leveling, and using the right adhesive, is essential for a successful installation.
-
Find expert recommendations on selecting adhesives suitable for tiling over linoleum. ↩
-
Explore professional advice on optimizing tile layout for symmetry and material efficiency. ↩
-
Explore techniques and tips that ensure successful tiling over linoleum flooring. ↩
-
Learn about essential steps for preparing surfaces to enhance tile adhesion. ↩
-
Discover sustainable adhesive options that don’t compromise on performance. ↩
-
Discover leveling compounds that ensure a smooth surface for successful tile installation over linoleum. ↩
-
Learn effective techniques for waterproofing floors to prevent moisture issues under tiles. ↩
-
Explore efficient tools that make linoleum removal easier, preparing for a new tile installation. ↩
-
Understand how experts evaluate floor conditions to ensure optimal results before tiling. ↩
-
Discover methods for repairing damaged linoleum, which ensures a solid base for tiles and prevents future issues. ↩
-
Understand how underlayment enhances floor stability by providing additional support beneath tiles. ↩
-
Explore detailed guidelines for successful tile installation over existing surfaces. ↩






