
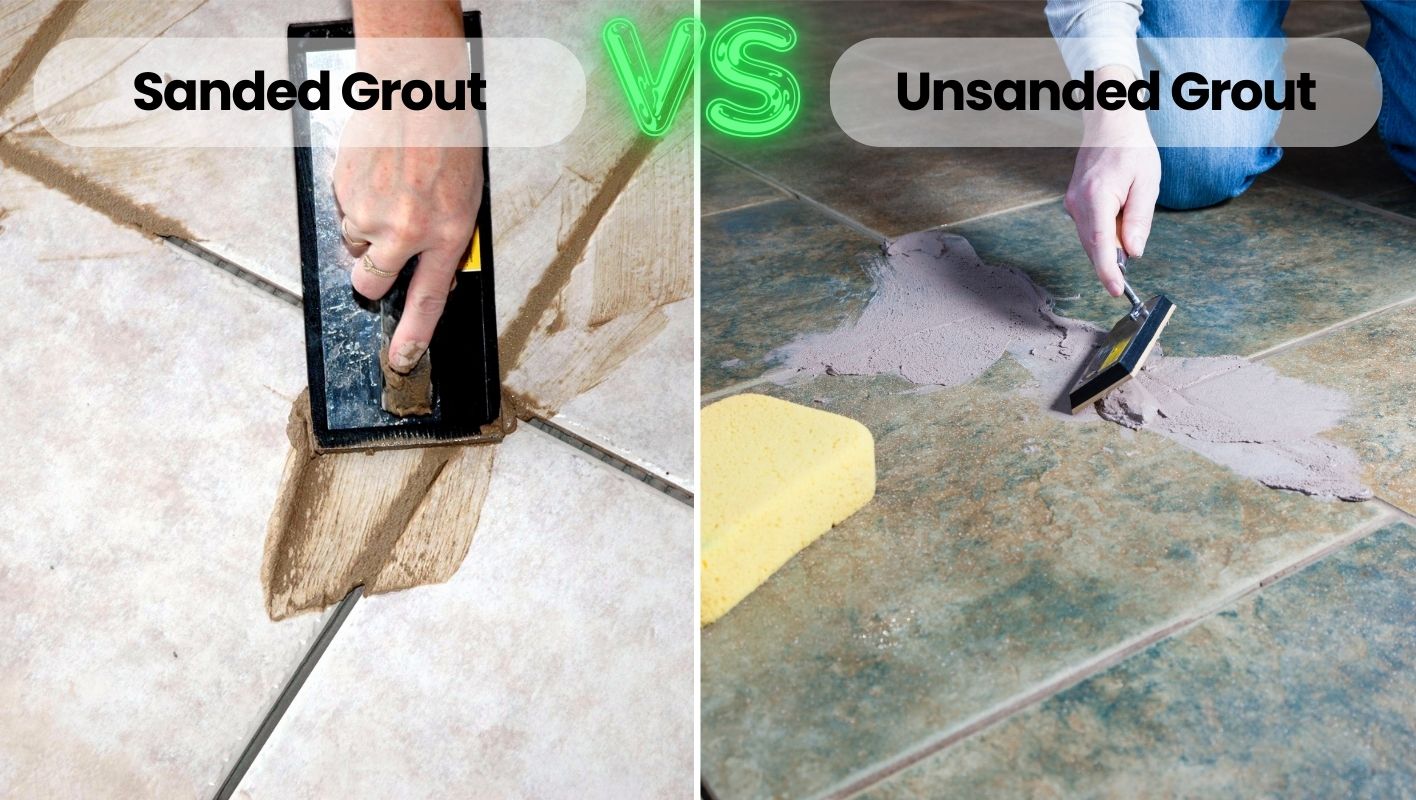
When I first tackled my own tiling project, I realized how crucial choosing the right grout was.
Sanded grout is ideal for larger joints because it’s tough and resists cracking, whereas unsanded grout is perfect for smaller joints and delicate tiles, providing a smooth finish without scratching sensitive surfaces.
Initially, I thought grout was just grout, but as I learned more, I discovered there are nuances that can make or break your tiling project. For instance, when working with larger tiles in my kitchen, sanded grout offered the strength needed to withstand wear and tear. However, in the bathroom, where I chose smaller, more delicate tiles, the unsanded option provided a smoother application that didn’t damage the surfaces. It’s these subtle differences that can significantly affect both the durability and aesthetic of your tile work.
Sanded grout is suitable for joints larger than 1/8 inch.True
Sanded grout is recommended for larger joints due to its durability.
Unsanded grout scratches delicate tile surfaces.False
Unsanded grout is smooth and doesn't scratch delicate surfaces.
How Does Joint Size Affect Grout Choice?
I remember the first time I tackled a tiling project; I was overwhelmed by the choices, especially grout. Who knew joint size could make such a difference?
Joint size determines grout choice by affecting color, texture, and flexibility. Narrow joints need unsanded grout for a smooth finish, while wider joints require sanded grout for strength.
Understanding Joint Size
When I first started learning about tiling, I was a bit puzzled by the term "joint size." Essentially, it’s the gap between your tiles. Picking the right grout for these joints is crucial because it impacts how long your tiling lasts and how good it looks. Joints typically fall into three categories:
- Narrow Joints (1/16" to 1/8"): I discovered that unsanded grout is best here. It’s smoother and perfect for tiles that are more on the delicate side.
- Standard Joints (1/8" to 3/8"): This is where sanded grout shines, offering the strength needed for everyday use.
- Wide Joints (Over 3/8"): For these, epoxy grout is often recommended due to its durability and resistance to stains.
Why Joint Size Matters
I’ve learned that the size of your tile joints impacts the type of grout in several significant ways:
| Joint Size | Grout Type | Key Considerations |
|---|---|---|
| Narrow | Unsanded | Smooth finish, prevents scratching delicate tiles |
| Standard | Sanded | Provides strength, prevents cracking |
| Wide | Epoxy or Sanded | High durability, suitable for areas with heavy use |
Additional Factors to Consider
Besides joint size, things like tile material, where you’re tiling, and how much moisture it’ll face also influence your grout choice. For example, tiles in wet areas1 like bathrooms might need waterproof grout.
Understanding these factors can help you avoid common pitfalls like cracking or discoloration. Selecting the right grout2 ensures your project not only looks great but lasts.
I always recommend checking with professionals or diving into some research to ensure every part of your project is well thought out. Manufacturers’ guidelines often provide valuable insights tailored for specific tile types.
Implications for Aesthetics and Functionality
Choosing the wrong grout can lead to both functional and aesthetic issues. For instance, using sanded grout in narrow joints can scratch delicate tiles like marble. On the flip side, unsanded grout in wide joints may cause weak bonds and potential cracking.
To maintain aesthetic appeal3, think about choosing a grout color that complements or contrasts with your tiles based on your design vision. This balance is key to achieving both durability and beauty in any tiling project.
Narrow joints require sanded grout for strength.False
Narrow joints use unsanded grout to avoid scratching delicate tiles.
Epoxy grout is ideal for wide tile joints.True
Epoxy grout offers durability and stain resistance for wide joints.
When is Sanded Grout the Best Choice?
I remember the first time I tackled a tiling project; choosing the right grout seemed like a minor detail, yet it made all the difference. Let’s dive into why sanded grout might be the perfect fit for your next venture.
Sanded grout is best for tile joints wider than 1/8 inch, enhancing stability and reducing shrinkage. It’s ideal for floors, countertops, and high-traffic areas due to its durability.
Understanding Sanded Grout
Back when I was learning the ropes of building materials, I discovered sanded grout’s unsung hero status in the world of tiling. It contains fine sand particles, which add strength and reduce the likelihood of cracking—a real game-changer for tile installations with joint widths over 1/8 inch. The sand fortifies the grout, making it less prone to shrinking, a crucial aspect if you’re working in high-stress environments where durability is non-negotiable.
Applications in Floor Tiling
I can still picture my first big floor tiling project in a bustling kitchen area. With people constantly moving through, the choice of sanded grout was a no-brainer. It offered the kind of robustness that kept the grout lines intact for years. If you’re planning on tackling a similar project, consider sanded grout for floor installations4. You’ll appreciate the peace of mind it brings knowing your hard work will stand the test of time.
Using Sanded Grout on Countertops
Countertops are another place where I found sanded grout to shine, especially those made from sturdy materials like granite or marble. I once helped a friend redo their kitchen, and the sanded grout held up beautifully against the daily barrage of spills and scratches. Its resilience makes it a reliable choice for surfaces that face constant wear and tear.
Outdoor Applications
One of my favorite projects was revamping a backyard patio using sanded grout. Its ability to withstand weather changes—be it rain or relentless sun—made it perfect for outdoor use. The result was a stunning patio that not only looked great but also held up season after season. Whether it’s for patios or garden paths, sanded grout’s strength across both vertical and horizontal surfaces exposed to the elements5 is unmatched.
| Application Area | Benefits of Sanded Grout |
|---|---|
| Floor Tiles | Increased durability against foot traffic |
| Countertops | Resistant to scratches and spills |
| Outdoor Installations | Withstands weather variations effectively |
Important Considerations
While I’ve sung praises about sanded grout, it’s crucial to note that it’s not a one-size-fits-all solution. In my experience, delicate tiles like polished stones or glass can be scratched by its abrasive nature during application. So, understanding your tiles6 and their specific needs is key to choosing the right grout type.
Sanded grout is ideal for joints wider than 1/8 inch.True
Sanded grout's sand particles provide strength for wider joints.
Sanded grout can scratch delicate tile surfaces.True
The sand in the grout may cause abrasions on sensitive tiles.
When Should You Use Unsanded Grout?
I remember my first tiling project, standing in the hardware store, utterly overwhelmed by grout options.
Unsanded grout is perfect for narrow joints, typically less than 1/8 inch wide, and delicate tiles like glass or polished stone. Its smooth texture prevents scratching and offers a flawless finish.
Understanding Unsanded Grout
Reflecting on my early days in tiling, I realized unsanded grout became my best friend when handling delicate projects. Its fine texture, free from abrasive particles, was a lifesaver for fragile surfaces, especially when I was working with intricate designs.
Ideal Joint Width
I vividly recall a project where the joints were so narrow, less than 1/8 inch, that only unsanded grout could do the job without causing cracks or shrinkage. It was a relief to see how smoothly it filled those tiny spaces, ensuring the mosaic masterpiece remained pristine.
| Joint Width | Recommended Grout Type |
|---|---|
| < 1/8 inch | Unsanded |
| > 1/8 inch | Sanded |
Compatible Tile Types
There was a time I worked with glass tiles for a friend’s kitchen backsplash. I knew unsanded grout was essential to avoid scratching those shiny surfaces. Its gentle touch ensured a perfect finish without a single blemish on the sensitive material.
Unsanded grout is suitable for glass tiles7 and polished stones, where sanded grout could potentially scratch the surface.
Application Techniques
While applying unsanded grout, I learned that patience and technique were key. Using a rubber float, I carefully pressed the grout into the joints. For those wider gaps or heavier tiles, I knew it was wise to switch to a different grout type8 to ensure stability.
Moisture and Stain Resistance
Unsanded grout was a breeze to clean but didn’t have the same stain resistance as sanded types. I always recommend sealing it post-installation to keep its look fresh and resist any discoloration over time.
Summary of Use Cases
These experiences taught me the nuances of grout selection, transforming what seemed like an overwhelming task into an enjoyable craft. If you’re embarking on your tiling journey, remember that choosing the right grout can make all the difference in achieving that flawless finish.
| Tile Type | Joint Width | Recommended Grout |
|---|---|---|
| Glass | < 1/8 inch | Unsanded |
| Polished Stone | < 1/8 inch | Unsanded |
| Porcelain | > 1/8 inch | Sanded |
Unsanded grout is best for joints less than 1/8 inch wide.True
Unsanded grout is ideal for narrow joints, preventing cracks.
Sanded grout is recommended for delicate glass tiles.False
Sanded grout can scratch delicate surfaces; unsanded is better.
How Do You Properly Apply Each Type of Grout?
Ever tried grouting and ended up with a mess? Don’t worry, you’re not alone. Let’s dig into how to nail it with different grout types.
Proper grout application means picking the right grout for your tile, prepping surfaces like a pro, and using the right tools. Sanded, unsanded, epoxy, and furan grouts each have their own playbook for application.
Understanding Different Grout Types
I remember my first grouting project like it was yesterday. I was so excited to see the finished look that I didn’t pay much attention to the details at first. But trust me, understanding the type of grout you’re using is key to success:
- Sanded Grout: I learned that this type is best for joints wider than 1/8 inch because it prevents shrinkage in large gaps. Imagine trying to fill a canyon with a garden hose—it’s just not going to cut it.
- Unsanded Grout: This is perfect for those delicate tiles like marble, used in joints smaller than 1/8 inch. It’s like handling a newborn kitten—gentle is the way to go.
- Epoxy Grout: Known for its durability and stain resistance, it’s perfect for high-moisture areas. If you’ve ever tried cleaning a stubborn stain off your bathroom tiles, you’ll appreciate this one.
- Furan Grout: This one’s a tough cookie, highly chemical-resistant and often used in industrial settings. Think of it as the Hercules of grouts.
Tools You’ll Need
| Tool | Purpose |
|---|---|
| Grout Float | For spreading grout across tiles |
| Sponge | To clean excess grout off tiles |
| Mixing Bucket | To mix grout to the right consistency |
| Trowel | Used to apply grout in narrow spaces |
Step-by-Step Application
Here’s the nitty-gritty on how to do it right:
-
Preparation:
- Clean the tile surface thoroughly to ensure adhesion. It’s like wiping down a canvas before painting.
- For sanded and unsanded grout9, mix the grout to a smooth consistency. Like making pancake batter—no lumps!
-
Application:
- Use a grout float to spread the mixture diagonally across the tiles. Think of it as frosting a cake, but with tiles.
- Press firmly to fill joints completely.
-
Cleaning:
- Wipe excess grout using a damp sponge. It’s like erasing pencil marks from paper.
- For epoxy grouts, follow specific cleaning steps due to their quick setting nature.
-
Curing:
- Allow grout to cure as per manufacturer’s instructions, typically 24-48 hours. Patience here is key, like waiting for bread dough to rise.
Common Mistakes to Avoid
- Over-watering the mix: This can lead to weak grout lines. I’ve learned this the hard way; too much water can be as bad as too little.
- Neglecting to seal: Especially crucial for epoxy and furan grouts10 to maintain their properties.
Tips for Perfect Grout Lines
Achieving those perfect lines can feel like chasing perfection, but here’s what helps me:
- Use consistent pressure when applying with a float.
- Work in small sections to manage cleaning effectively.
- Maintain uniform grout width with spacers during tile installation.
Understanding these specific applications11 ensures you can achieve professional-grade results with any grout type. Remember, each type requires slight modifications in technique and tools for optimal performance.
Sanded grout is best for joints wider than 1/8 inch.True
Sanded grout prevents shrinkage in large gaps, making it ideal for wider joints.
Epoxy grout is unsuitable for high-moisture areas.False
Epoxy grout is known for its durability and stain resistance, perfect for wet areas.
Conclusion
Sanded grout is best for wider joints, providing strength and durability, while unsanded grout suits narrow joints, ensuring a smooth finish without scratching delicate tiles.
-
Discover which grouts are best suited for wet environments to prevent moisture damage. ↩
-
Learn how to select the appropriate grout to ensure long-lasting tile installations. ↩
-
Explore tips on choosing grout colors that enhance tile aesthetics effectively. ↩
-
Explore detailed reasons why sanded grout is ideal for flooring projects. ↩
-
Discover why sanded grout is suitable for outdoor use. ↩
-
Understand precautions when using sanded grout with delicate tiles. ↩
-
Learn why unsanded grout is ideal for glass tiles and how it preserves the tile’s surface integrity. ↩
-
Understand different scenarios for using sanded and unsanded grouts to make informed decisions for your project. ↩
-
Learn about the different applications and benefits of sanded versus unsanded grout to choose the right one for your project. ↩
-
Sealing epoxy and furan grouts is vital for long-term durability; this link provides detailed sealing instructions. ↩
-
This link offers insights on maintaining uniformity and precision in grout lines, crucial for a professional finish. ↩






