
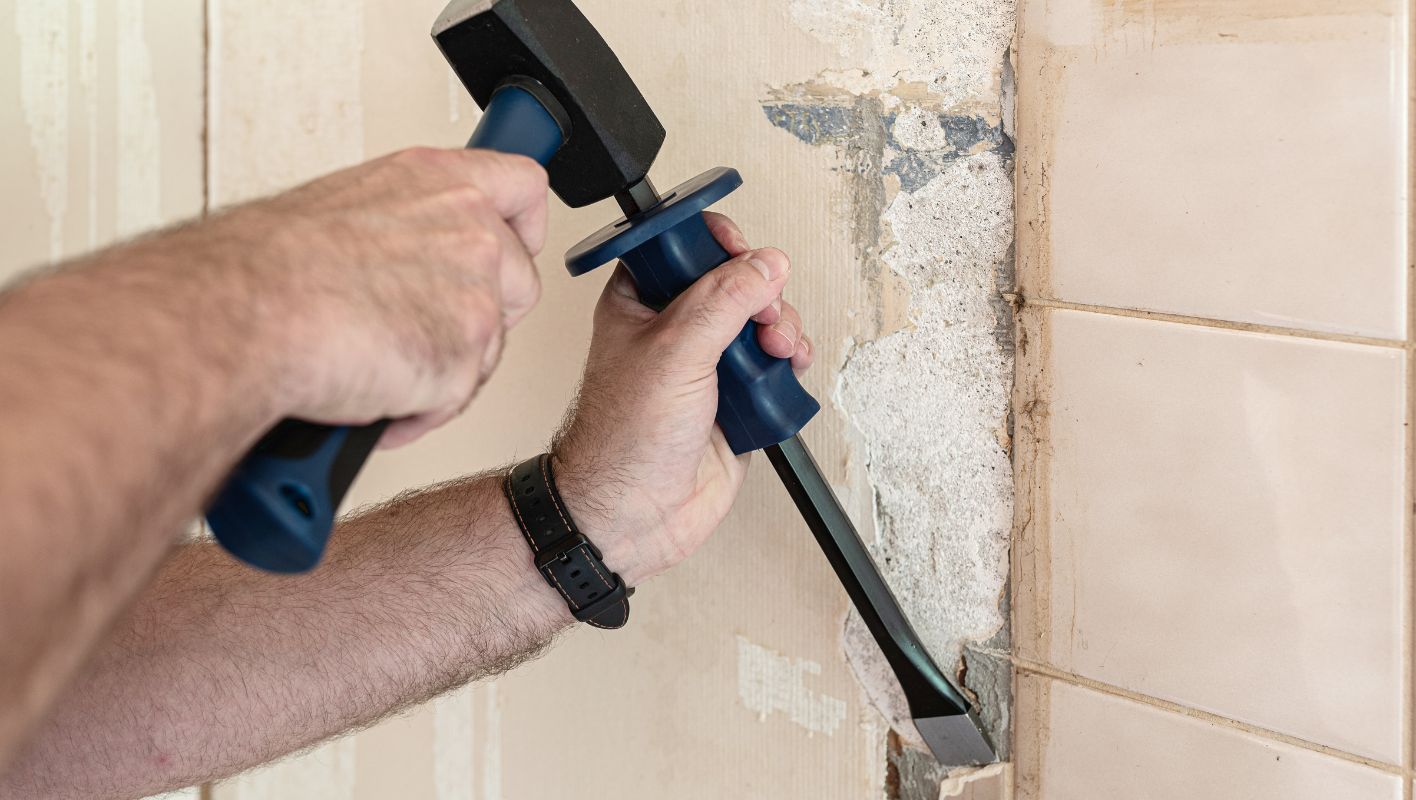
Ever stared at a wall of outdated tiles and wondered how to tackle them without wreaking havoc?
To remove tiles like a pro, you’ll need some trusty tools: a hammer, chisel, and scraper. Begin by carefully cutting through the grout with a grout saw. Next, gently work your chisel and hammer to pry each tile off. Take your time—precision protects the wall beneath.
I remember the first time I decided to revamp my bathroom. Staring at those stubborn tiles, I knew I needed a plan. It’s not just about brute force; it’s about finesse. By breaking down each step, ensuring you have the right tools, and taking your time, you’ll not only protect the wall beneath but also make the task a whole lot easier. Let’s dive into the details and make this renovation project as smooth as possible.
Using a chisel and hammer can damage the wall.True
Improper use of a chisel and hammer can cause wall damage.
Removing grout lines is unnecessary for tile removal.False
Removing grout lines prevents tiles from cracking during removal.
What Tools Do You Need for Tile Removal?
Thinking about ripping up those old tiles? With the right gear, it’s a breeze! Let’s dive into the must-have tools to make your tile removal adventure both safe and efficient.
To successfully remove tiles, you’ll need essentials like a hammer, chisel, floor scraper, power drill with a tile removal bit, and safety gear such as goggles and gloves. These tools not only simplify the task but also protect the underlying surfaces from damage.
I remember the first time I decided to tackle tile removal in my own home. It was one of those DIY projects that seemed simple enough—until I started without the right tools. The whole ordeal quickly turned into a comedy of errors! Lesson learned: having a well-prepared toolkit is half the battle won.
Essential Hand Tools
When you’re working on smaller areas or need precision, hand tools are your best friends. A hammer paired with a chisel is perfect for loosening those stubborn tiles. Plus, a floor scraper comes in handy for cleaning up adhesive residue.
| Tool | Purpose |
|---|---|
| Hammer | Breaking tiles |
| Chisel | Loosening tiles |
| Floor Scraper | Removing adhesive residues |
These tools are easy to find at your local hardware store and won’t break the bank. Trust me, they’re lifesavers!
Power Tools for Efficiency
For larger areas, power tools can make your life so much easier. I once helped a friend renovate their kitchen, and a power drill with a tile removal bit was a game-changer. It sped up the process and left a neat finish, reducing manual labor1 significantly compared to using hand tools.
Safety Gear
Tile removal isn’t just messy—it can be hazardous too. Flying debris and dust are part of the package, so gear up with goggles and gloves. A dust mask is also wise to avoid inhaling any nasties. Safety should never be compromised; I learned this the hard way after a sneezing fit that lasted for days!
Specialized Tools for Specific Scenarios
If you’re dealing with concrete or shower areas, specialized tools might be necessary. For instance, a heat gun is great for softening stubborn adhesives, while a rotary hammer can tackle those tougher surfaces effectively.
| Scenario | Recommended Tool |
|---|---|
| Concrete surfaces | Rotary hammer |
| Shower areas | Heat gun |
Each tool has its unique application, ensuring you have the right equipment for any tile removal task. With these in your arsenal, you’ll be ready for whatever your tile removal journey throws at you.
A hammer is used for loosening tiles.False
A chisel, not a hammer, is used for loosening tiles.
Safety gear is crucial for tile removal.True
Safety gear like goggles and gloves protect against debris and dust.
How can you prepare your wall for safe tile removal?
Hey there! Have you ever stared at a wall full of tiles, wondering how to tackle them without turning your home into a construction zone?
To safely prepare your wall for tile removal, start by clearing the area, protecting nearby surfaces with drop cloths, and gently prying tiles loose using a putty knife. Evaluate moisture issues and apply barriers if necessary.
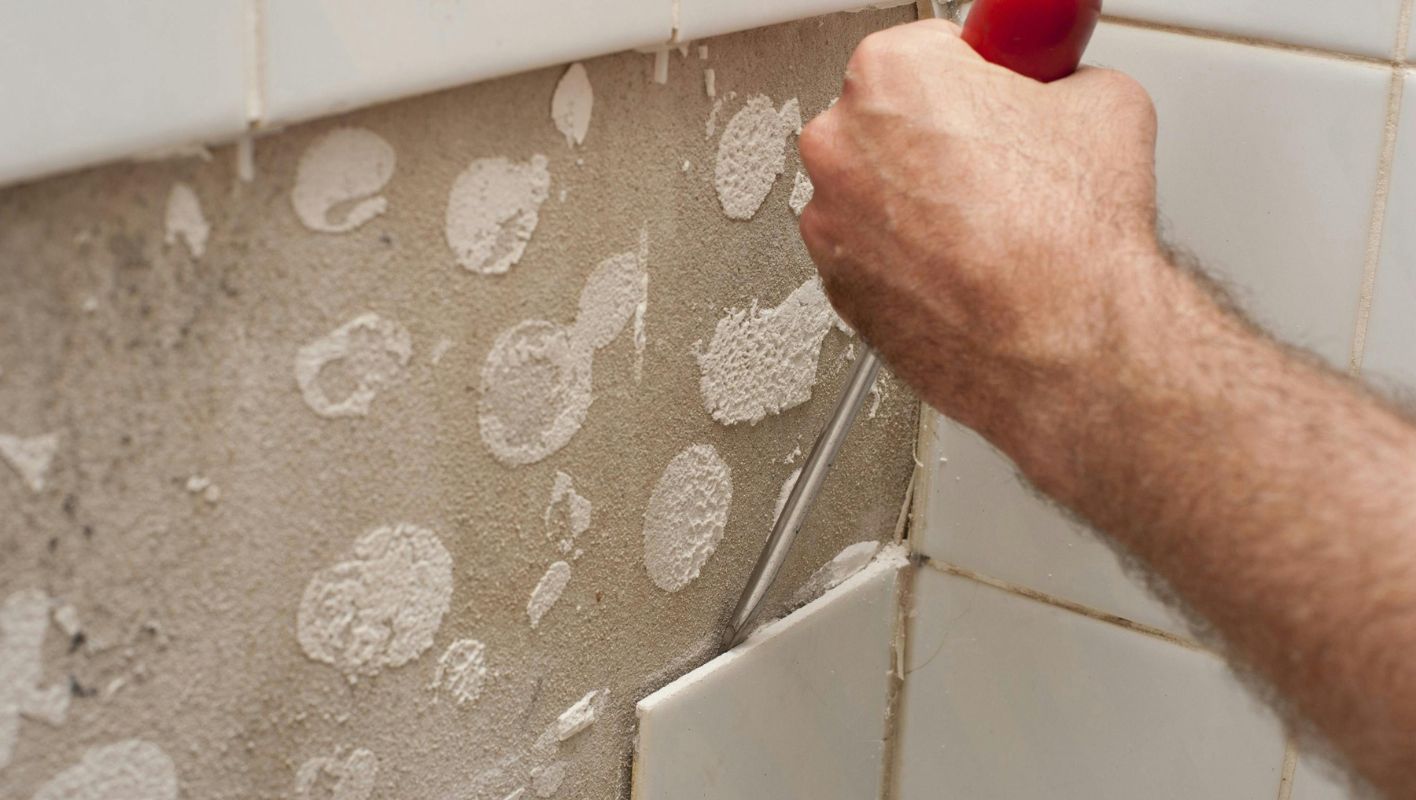
Step 1: Gather Essential Tools and Materials
Before I even think about prying tiles off the wall, I like to arm myself with the right tools. It’s like gearing up for a mini adventure in my own home. I make sure to have a trusty putty knife, plenty of drop cloths, and—never underestimate the importance of this—safety goggles and a dust mask. If you’ve ever had tile dust in your eyes or lungs, you’ll know these are lifesavers. And for those stubborn tiles that refuse to budge, I sometimes grab an adhesive remover.
| Tool | Purpose |
|---|---|
| Putty Knife | Loosen tiles |
| Drop Cloths | Protect surfaces |
| Safety Goggles | Eye protection |
| Dust Mask | Prevent inhalation |
Step 2: Clear the Area
I learned the hard way that removing tiles can get messy fast. So, I always start by moving furniture out of the way. It’s like giving myself a clean canvas to work on. I lay down drop cloths on the floor and cover nearby surfaces—trust me, my floors have thanked me for it. I also use painter’s tape to seal off sockets and switches; keeping dust out is a game changer.
Step 3: Assess Wall Condition
Now comes the part where I channel my inner detective. I inspect the wall for any signs of moisture or cracks. Imagine my surprise when, during one of my projects, I found a sneaky leak that could have turned my simple tile removal process2 into a nightmare. If you find any major issues, it’s worth consulting a professional.
Step 4: Start with Edge Tiles
Starting at the edge makes everything feel manageable. I gently wedge a putty knife under a tile’s edge and apply just enough pressure to pop it off without harming the wall beneath. It’s a bit like peeling an orange—once you get going, it’s oddly satisfying.
Step 5: Handle Adhesive Residue
Once those tiles are off, dealing with adhesive residue can be like trying to remove gum from hair. I use an adhesive remover or scraper carefully to avoid scraping the wall itself. For the really stubborn stuff, consider using a chemical solution3 designed for tile adhesive.
Step 6: Moisture Barrier Consideration
If there’s any sign of moisture lurking, consider installing a moisture barrier before re-tiling. After one too many moisture mishaps, I’ve learned that this step can save a lot of heartache down the line and extend the life of your new tiles. Knowing when and how to use these barriers makes all the difference in wall longevity4.
A putty knife is essential for loosening tiles safely.True
A putty knife helps gently pry tiles without damaging the wall.
Moisture barriers are unnecessary after tile removal.False
Moisture barriers can prevent future damage, extending tile lifespan.
What Are the Best Techniques for Minimizing Wall Damage?
Ever accidentally dinged a wall and wished you’d protected it better? I’ve been there too. Let’s explore simple techniques to keep those walls pristine.
To minimize wall damage, I recommend installing corner guards and chair rails, using impact-resistant paint, and ensuring proper fixture installation. Regular maintenance and selecting durable materials are also key strategies.
Protective Features: Corner Guards and Chair Rails
I remember moving into my first apartment and noticing how worn the corners of the walls were from previous tenants. I wish I had known about corner guards back then! They’re fantastic for preventing the kind of scuffs that seem to appear out of nowhere in high-traffic areas. Available in materials like plastic, metal, and rubber, these guards can be both practical5 and stylish. And let’s not forget chair rails—they’re a decorative touch that can save walls from furniture bumps.
| Technique | Benefits |
|---|---|
| Corner Guards | Protects corners from impact |
| Chair Rails | Prevents furniture-related damage |
Impact-Resistant Paint
Have you ever watched in horror as someone brushes by a freshly painted wall, leaving an unsightly mark? That’s when I discovered impact-resistant6 paint, which has been a game-changer for me. This paint is designed to withstand everyday knocks, thanks to its elastomeric compounds that provide flexibility and durability. It’s perfect for busy households or bustling office spaces where walls take a beating.
Proper Installation of Fixtures
I once hung a shelf that came crashing down, taking a chunk of wall with it—talk about a learning experience! Secure installation of shelves, hooks, and other fixtures is crucial. Use the right hardware for your wall type to avoid unnecessary stress and potential damage.
Regular Maintenance and Material Selection
I’ve found that regular wall inspections can save you from major headaches down the line. Look for any signs of moisture or structural issues—catching these early can prevent significant damage. When choosing materials, I always go for durability. Reinforced drywall or fiber cement board are excellent for areas prone to wear.
Opting for sustainable materials not only helps our planet but also keeps your walls looking great for longer. Products certified by environmental standards are an investment that pays off in both residential and commercial settings. By integrating these strategies, I’ve managed to keep my spaces looking fresh and damage-free7.
Corner guards protect walls from furniture impact.False
Corner guards protect walls from impact, not specifically furniture.
Impact-resistant paint contains elastomeric compounds.True
Impact-resistant paint includes elastomeric compounds for flexibility.
What are the best ways to dispose of old tiles responsibly?
Ever stood knee-deep in renovation dust, wondering what to do with those old tiles? I’ve been there too! Let’s explore the best ways to give those tiles a new purpose.
To dispose of tiles responsibly, I suggest exploring recycling, donating, or using designated landfill sites. Look into local facilities that accept tile waste and think creatively about how you might repurpose them for a greener solution.
Recycling Options for Tile Waste
Remember the time I tackled my first major renovation project? Sorting through piles of debris, I learned that recycling tiles can be both sustainable and rewarding. Many recycling centers will accept ceramic and porcelain tiles, grinding them into materials for new projects. I found it helpful to check in with local facilities to see if they offered this service.
| Facility Type | Services Offered | Location Search |
|---|---|---|
| Local Landfill | Tile disposal | Find nearby8 |
| Recycling Center | Tile recycling | Search here9 |
Donating Old Tiles
I once stumbled upon a stash of beautiful but unused tiles in my garage. Rather than let them gather dust, I decided to donate them. Organizations like Habitat for Humanity ReStores10 often welcome building materials, giving your old tiles a new lease on life.
Creative Reuse Projects
Let’s talk creativity! Those old tiles can transform into stunning garden pathways or unique mosaic art. I remember making a mosaic table top that became the talk of our family gatherings. Think about diving into DIY projects or offer them on community exchange platforms for others to get creative with.
Complying with Local Regulations
Before you start loading up your car with tiles, make sure to check local waste management policies. Some areas have specific guidelines for construction waste. I found contacting the local waste management authority or visiting their website incredibly useful.
Local Waste Management Guidelines11
By being informed and opting for eco-friendly methods, not only do you contribute positively to the environment, but you also ensure compliance with local regulations. It’s about making responsible choices that benefit our planet and community.
Recycling centers always accept ceramic tiles for recycling.False
Not all recycling centers accept ceramic tiles; check local facilities.
Donating tiles can help construction projects.True
Organizations like Habitat for Humanity accept tile donations for projects.
Conclusion
Learn how to remove wall tiles professionally with essential tools, safety tips, and eco-friendly disposal methods for a smooth renovation experience.
-
Explore how power tools enhance efficiency and precision in tile removal tasks, saving time and reducing effort. ↩
-
Discover the necessary tools for efficient and safe tile removal. ↩
-
Explore effective chemical solutions that make tile adhesive removal easier. ↩
-
Learn how moisture barriers can protect your walls and enhance tile durability. ↩
-
Explore the variety of corner guards available to find those offering the best balance of durability and design. ↩
-
Understand the advantages of using impact-resistant paint and how it helps in maintaining wall aesthetics. ↩
-
Learn about durable wall materials that improve longevity and offer better protection against damage. ↩
-
Find nearby landfills that allow the responsible disposal of tile waste. ↩
-
Discover local recycling centers dedicated to processing various building materials, including tiles. ↩
-
Check if Habitat for Humanity ReStores accept tile donations for use in community projects. ↩
-
Understand local regulations and guidelines for disposing of construction waste responsibly. ↩






