 Skip to content
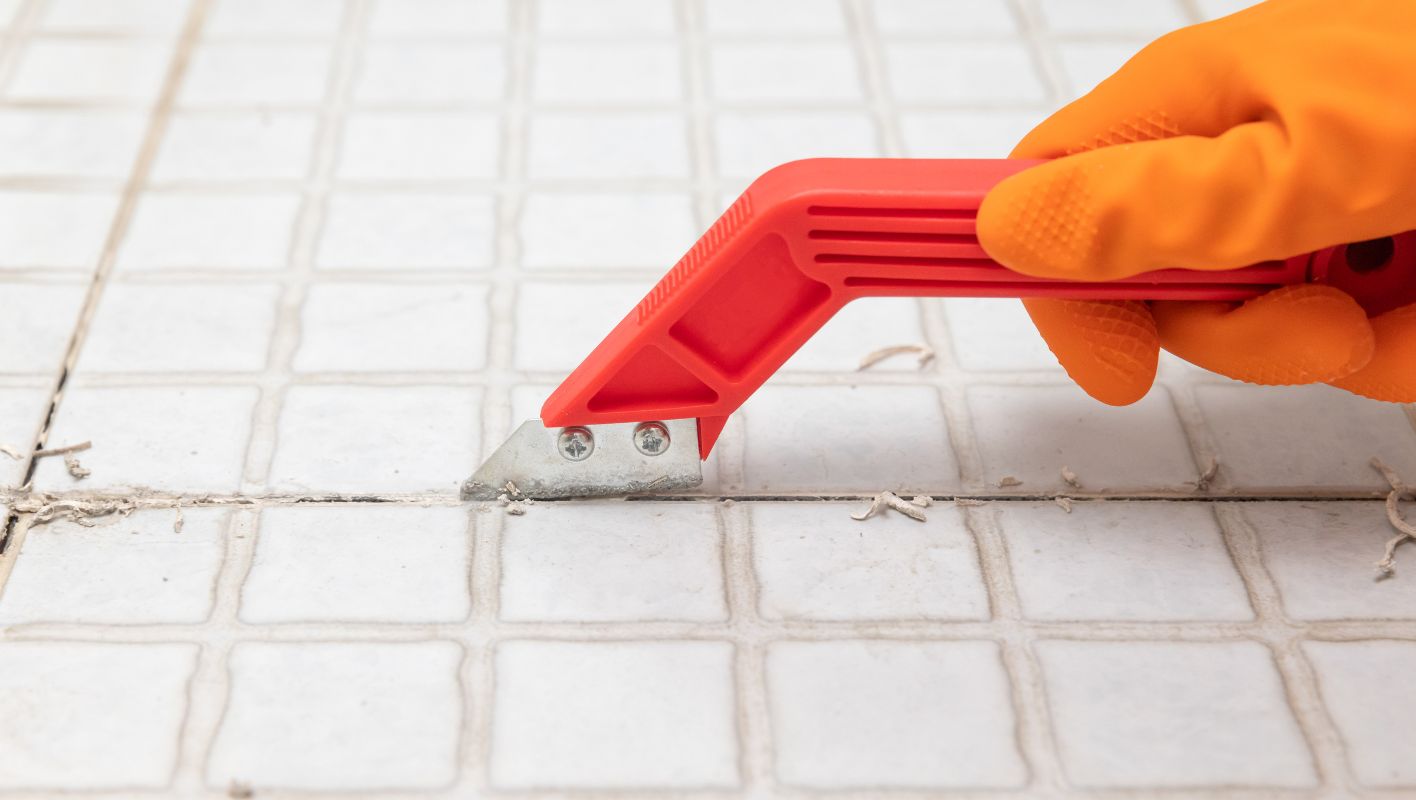
Ever found yourself staring at grubby grout, dreaming of pristine tiles? Tackling grout removal can rejuvenate your space, but it demands care and the right know-how.
To effectively remove grout from tile, combine manual and chemical methods like using a grout saw or sugar water solution. These approaches break down and loosen grout, making it easier to remove without damaging your tiles.
I’ll never forget the first time I faced the daunting task of removing grout. It was a weekend project in my own kitchen, aiming to bring back some sparkle. The initial steps seemed straightforward, yet achieving that smooth finish felt elusive. As I delved deeper into the process, I realized how crucial it was to choose the right tools for my particular tile type. Understanding these nuances made all the difference. Stick with me as I share detailed instructions, expert tips, and common pitfalls to sidestep during your grout removal journey. Trust me, you’ll want to avoid my early missteps!
Using a grout saw is effective for grout removal.True
A grout saw can manually cut and remove grout without damaging tiles.
Sugar water solution damages tile surfaces during grout removal.False
Sugar water helps loosen grout without harming the tile surface.
What Tools Do You Need for Grout Removal?
Ever felt like grout removal was a Herculean task? With the right tools, it becomes a breeze, transforming your tile project into a rewarding endeavor.
For effective grout removal, you’ll need a grout saw, an oscillating multi-tool with a grout removal blade, and a rotary tool. Don’t forget safety gear like goggles and gloves to protect yourself during the process.
Essential Grout Removal Tools
Let me take you back to the time I decided to give my bathroom a facelift. The tiles were beautiful, but the grout had seen better days. Initially, I was overwhelmed, wondering if I had bitten off more than I could chew. But then I learned that having the right tools makes all the difference. Here’s what I found most helpful:
-
Grout Saw: Perfect for those smaller spaces or when precision is key. It’s manual, so yes, it takes a bit of elbow grease, but it’s also wonderfully precise. Think of it like gardening—satisfying once you see the results.
-
Oscillating Multi-Tool: Now, this is a powerhouse! Equipped with a grout removal blade, it tackles larger areas efficiently. It’s like having a Swiss army knife for your home projects, adaptable and indispensable for many home improvement projects1.
-
Rotary Tool: When it comes to tight corners and intricate designs, the rotary tool is your best friend. With the right attachments, it grinds away grout effortlessly.
Safety Equipment
Safety first—trust me on this one. I learned my lesson after my first attempt at DIY tiling. Always gear up with:
- Safety Goggles: They keep your eyes safe from flying debris.
- Gloves: Essential to protect your hands against sharp edges and accidental slips.
- Dust Mask: Especially important in less ventilated areas to keep dust at bay.
Comparing Grout Removal Tools
| Tool | Best For | Pros | Cons |
|---|---|---|---|
| Grout Saw | Small areas | Precision, control | Labor-intensive |
| Oscillating Multi-Tool | Large areas, versatility | Fast, efficient | Can be expensive |
| Rotary Tool | Corners and tight spaces | Detailed work, adaptable attachments | May require skill to handle safely |
Making Your Choice
Choosing the right tool really depends on the size and complexity of your project. My tip? Mix it up with both manual and power tools for the best flexibility and efficiency. For more detailed guidance on picking the perfect tool, check out our detailed guide2.
By arming yourself with these essential tools and safety gear, you’re well-prepared to tackle any grout removal project, paving the way for re-grouting or even a fresh tile installation. Who knew home improvement could be so satisfying?
A grout saw is best for large areas of grout removal.False
A grout saw is best for small areas, not large ones.
Safety goggles are essential when removing grout.True
Safety goggles protect eyes from dust and debris during removal.
Is Sugar Water Effective for Grout Removal?
Have you ever wondered if sugar water could magically remove grout? Let’s explore this intriguing method together.
Yes, sugar water can help soften grout, particularly when it’s fresh, making removal easier. However, for older, hardened grout, you’ll likely need more robust mechanical methods.
Discovering the Secret of Sugar Water
I first stumbled upon the idea of using sugar water for grout removal while chatting with a fellow DIY enthusiast. It sounded almost too simple to be true, but the science made sense. Sugar is hygroscopic, meaning it attracts and holds onto water molecules. This property can work wonders on fresh grout, which is more absorbent and susceptible to softening. I remember trying it on a newly tiled kitchen floor, and to my delight, the grout seemed to yield more easily than I’d expected.
Traditional Methods vs. Sugar Water
If you’re like me and have dealt with grout that’s been set for years, you know it can be as stubborn as a mule. In those cases, traditional methods like a trusty grout saw or oscillating tool might be your best bet. I’ve spent many weekends sweating over these tools, appreciating their efficiency, even if they do require a bit more elbow grease.
| Method | Time Efficiency | Cost | Environmental Impact |
|---|---|---|---|
| Sugar Water | Low | Low | Low |
| Grout Saw | Medium | Medium | Medium |
| Oscillating Tool | High | High | Medium |
Practical Tips for Trying Sugar Water
For those curious about giving sugar water a shot, here’s what worked for me: mix a solution of sugar with warm water until it’s dissolved completely. Apply it generously on the grout lines with a sponge and let it sit for 15-20 minutes. This allows the solution time to work its magic by penetrating and softening the grout. For a detailed guide, you might find DIY Grout Removal3 helpful.
Exploring Other Natural Alternatives
In my endless quest for safe and effective cleaning solutions, I’ve also tried other natural methods like vinegar or baking soda paste. These options can be great depending on the age and type of grout you’re dealing with. Vinegar’s acidity, for example, can tackle older grout effectively but should be used carefully on delicate tiles. If you’re interested in exploring more eco-friendly options, check out natural cleaning solutions4. Each method has its strengths and limitations, much like any tool in our DIY arsenal.
Sugar water is effective on fresh grout.True
Sugar's hygroscopic nature helps soften fresh grout, aiding removal.
Mechanical tools are more effective on old grout.True
Older grout is hardened, requiring more force for effective removal.
How can I remove grout without damaging my tiles?
I remember standing in my kitchen, staring at the discolored grout that seemed to mock my every attempt at cleanliness.
To remove grout without damaging tiles, I prefer manual tools like a grout saw or utility knife for precision. For larger areas, using a rotary tool with a grout removal attachment is effective. The key is to work slowly and protect tile edges with tape.
Manual Methods for Grout Removal
When I first tackled the daunting task of grout removal, I opted for manual tools to keep things under control. Using a grout saw5 or utility knife allowed me to precisely scrape out the grout without worrying about damaging my tiles.
- Grout Saw: This tool was a lifesaver! Its serrated blade fit snugly into the grout lines, allowing me to scrape with precision.
- Utility Knife: Perfect for those intricate areas. By gently scoring along the grout line, I could peel away the layers with care.
I learned quickly to keep the blades sharp and apply just enough pressure to avoid slipping and scratching the tiles.
Using Power Tools Effectively
When faced with a larger area, power tools seemed like a logical choice. A rotary tool with a grout removal attachment became my go-to. Here’s what I found:
| Tool | Pros | Cons |
|---|---|---|
| Rotary Tool | Fast removal, adjustable speed | Risk of tile damage |
| Oscillating Tool | Versatile, precision control | Requires practice |
These tools were efficient but required a gentle touch:
- Adjust Speed Settings: Starting at a low speed and slowly increasing it was crucial for me.
- Tile Protection: I made sure to mask off the edges of my tiles with painter’s tape to prevent accidental scratches.
Protective Measures
Protecting my tiles didn’t stop with careful tool use. I also took extra steps:
- Masking Tape: Lining the tile edges with masking tape gave me peace of mind.
- Workspace Preparation: Laying down a protective sheet over my workspace helped catch debris.
- Proper Ventilation: Ensuring good ventilation was essential to avoid inhaling dust particles.
These precautions not only safeguarded my tiles but also made for a safer work environment.
Choosing the Right Grout Removal Method
Deciding between manual and power methods was all about the project’s scope and my comfort level. Here’s how I evaluated:
- Tile Sensitivity: For my delicate tiles, manual methods felt safer.
- Project Size: For large areas, power tools were more efficient.
- Skill Level: As a beginner, starting with manual methods helped me gain confidence before moving on to power tools.
Explore further about manual vs power tools6 to determine which suits your needs best. Whichever method you choose, prioritize patience and precision for the best results.
By weighing these factors, I could choose the best method for each project, ensuring patience and precision throughout. Whether refreshing my bathroom or sprucing up the kitchen, my tiles stayed pristine, showcasing their beauty.
Manual tools are safer for delicate tile grout removal.True
Manual tools offer better control, reducing the risk of tile damage.
Power tools guarantee no damage to tiles during grout removal.False
Power tools can be efficient but increase the risk of tile damage.
What are the Best Practices for Cleaning Up After Grout Removal?
Cleaning up after grout removal isn’t just about tidiness; it’s about preserving the beauty of your tiles.
To clean up after grout removal, start by wiping tiles with a damp sponge to remove excess grout. Use a grout haze remover for persistent residue. Finish by buffing the tiles with a dry cloth for a polished look.
Essential Tools and Materials for Grout Cleanup
Having the right tools on hand is like setting yourself up for success. Trust me, when you’re knee-deep in a project, the last thing you want is to be scrambling for supplies. Here’s my go-to list:
| Tool/Material | Purpose |
|---|---|
| Damp Sponge | Initial wipe-down of tiles to remove grout residue. |
| Grout Haze Remover | To tackle stubborn haze left on tiles. |
| Dry Cloth | Final buffing to achieve a polished finish. |
| Soft Bristle Brush | To reach grout lines and corners effectively. |
These items are lifesavers when it comes to making sure your tiles look as amazing as you envisioned.
Step-by-Step Cleanup Process
-
Initial Wipe-Down: Picture this—you’re just finished grouting, and you’re ready to admire your handiwork. Grab that damp sponge and get to work on the tiles. This step is all about catching that loose grout before it has a chance to set.
-
Apply Grout Haze Remover: Stubborn haze is like that one friend who overstays their welcome. For those lingering bits, I rely on a commercial grout haze remover7. Just follow the instructions on the bottle, and you’re good to go.
-
Buffing the Tiles: This is where the magic happens. Take a dry cloth and give those tiles a good buffing. It’s the cherry on top for achieving that polished, professional finish.
Alternative Methods and Considerations
- Vinegar Solution: I once tried using a vinegar-water mix—one part vinegar to four parts water—as a greener option. It worked surprisingly well!
- Avoiding Scratches: Trust me, using non-abrasive tools is crucial. You don’t want scratches ruining all your hard work.
- Protective Gear: Safety first! Gloves and goggles are a must when dealing with chemical cleaners.
Troubleshooting Common Issues
- Persistent Haze: If it just won’t budge, sometimes a professional-grade cleaner8 is needed.
- Discoloration: I learned this the hard way—sometimes discoloration means the grout mix was off or applied poorly.
- Streak Marks: Those pesky streaks can happen from improper rinsing or drying. A thorough clean-up ensures they don’t stick around.
Following these steps not only keeps your space looking great but also helps maintain the durability of your tile work.
A damp sponge is used for initial tile wipe-down.True
A damp sponge helps remove loose grout before it dries.
Vinegar solution is not recommended for grout cleanup.False
A vinegar-water solution is an eco-friendly alternative for cleaning.
Conclusion
Learn effective methods to remove grout from tiles using manual and power tools, along with safety tips and cleanup techniques for a pristine finish.
-
This link will provide ideas and tips on utilizing an oscillating multi-tool for various home projects beyond just grout removal. ↩
-
This link offers a detailed guide on selecting the best tool for your specific grout removal needs, enhancing your project’s success. ↩
-
This link offers practical steps for applying sugar water in grout removal, useful for DIY enthusiasts seeking detailed guidance. ↩
-
This link provides alternative natural cleaning methods, offering eco-friendly solutions for readers concerned about chemical use. ↩
-
Discover how a grout saw works and its safe usage tips for effective grout removal without tile damage. ↩
-
Learn the advantages and disadvantages of using manual versus power tools for efficient grout removal. ↩
-
Discover top-rated grout haze removers that efficiently clear stubborn residue without damaging your tiles. ↩
-
Explore powerful professional-grade cleaners that ensure thorough removal of grout haze and tough stains. ↩







