
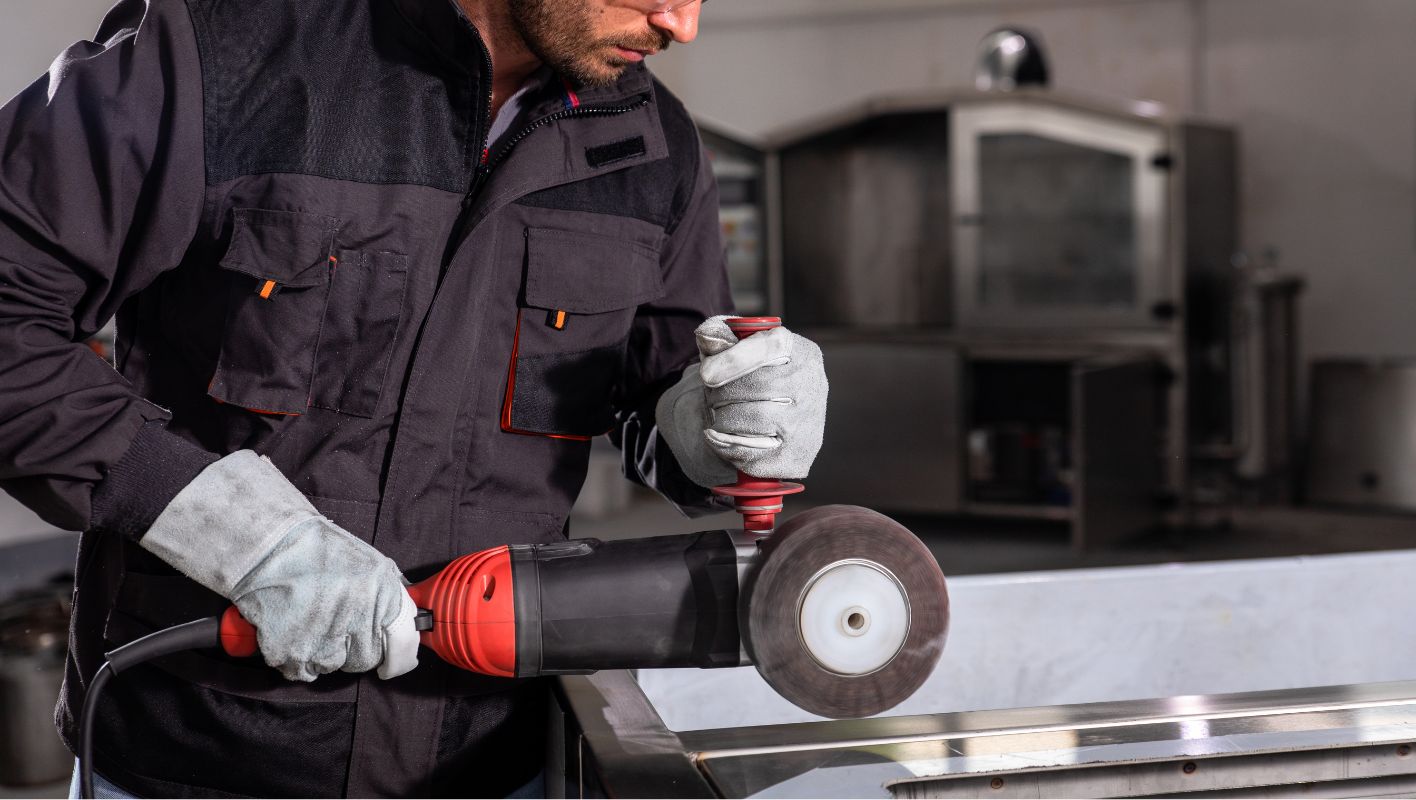
Ever noticed how stainless steel can lose its sparkle over time? Let’s dive into how you can bring back that brilliant shine.
To polish stainless steel, start by thoroughly cleaning the surface with a mild detergent. Apply a stainless steel polish or a mix of baking soda and water using a non-abrasive cloth. Always rub in the direction of the grain for a perfect finish.
I remember the first time I tried to polish my stainless steel sink. It had lost its luster, looking more like dull aluminum than shiny steel. After some trial and error, I found the secret was in the details—cleaning thoroughly first, then using just the right amount of elbow grease. The key is patience and gentle persistence. Whether you’re working on kitchen appliances or outdoor fixtures, these extra steps will make your stainless steel gleam like it’s brand new. So, let’s explore some additional tips and techniques to keep that shine lasting longer.
Polishing stainless steel requires abrasive materials.False
Non-abrasive cloths are recommended to avoid scratches.
Baking soda can be used to polish stainless steel.True
Baking soda mixed with water is effective for polishing.
What Tools and Materials Do I Need for Polishing Stainless Steel?
Ever spent a weekend afternoon trying to restore the shine to your stainless steel and felt like you were arm-wrestling a cloud?
To polish stainless steel effectively, you’ll need a set of abrasives like sandpaper, polishing compounds, buffing wheels, and of course, protective gear. These essentials help in achieving that smooth, shiny finish and reviving the metal’s dazzling luster.
Essential Tools for Polishing
I remember my first attempt at polishing stainless steel. I thought, "How hard can it be?" Until I realized I was missing half the tools I needed! Here’s what I’ve learned since then:
-
Abrasives: You’ll want to have various grit sandpapers, ranging from 400 to 3000 grit, on hand. These are crucial for tackling scratches and any surface imperfections.
-
Polishing Compounds: I once used a rogue compound thinking it was rouge—what a mess! Make sure to choose the right polishing compound, like rouge or green compounds, which can significantly affect your final result. Choosing the right compound1 is essential.
-
Buffing Wheels: These attach to a rotary tool or bench grinder and come in soft, medium, and hard varieties. They’re perfect for achieving different levels of polish.
-
Protective Gear: Safety first! Don’t forget goggles, gloves, and masks. Trust me, protecting yourself from dust and debris is crucial.
Materials to Enhance the Process
| Material | Purpose |
|---|---|
| Lubricants | Reduce friction and heat during sanding |
| Microfiber Cloths | For wiping and adding final touches |
| Masking Tape | To protect areas not being polished |
Tips for Effective Polishing
One time, I skipped pre-cleaning because I was in a rush—big mistake! Always clean your surface thoroughly with a mild detergent or degreaser before you start.
- Technique: Move in consistent circular motions to avoid streaks. It’s like giving your stainless steel a massage!
- Environment: Ensure you’re working in a well-ventilated area to avoid inhaling dust.
Every tool and material choice matters when you’re aiming for that perfect polish. Careful selection and thoughtful application will ensure your stainless steel shines brightly for years to come. For more tips on maintaining polished surfaces, check out surface care tips2.
Abrasives are not needed for polishing stainless steel.False
Abrasives like sandpaper are essential for removing scratches.
Buffing wheels come in different hardness levels.True
Buffing wheels are available in soft, medium, and hard types.
Can Household Items Be Used for Polishing Stainless Steel?
Ever found yourself staring at your stainless steel appliances, wondering if there’s a budget-friendly way to make them gleam again?
Yes, household items like vinegar, baking soda, and olive oil can effectively polish stainless steel. These items are accessible, eco-friendly, and affordable alternatives to specialized commercial products.
Using Vinegar for a Sparkling Shine
There was a day when I stood in my kitchen, exasperated by the dullness of my stainless steel fridge. I remembered my grandma swearing by vinegar for everything, from cleaning windows to polishing furniture. So, I decided to give it a try. I mixed equal parts of water and white vinegar3 in a spray bottle, spritzed it onto the fridge, and wiped it with a microfiber cloth. To my surprise, it worked like magic! The grime vanished, leaving behind a streak-free shine.
Baking Soda as a Gentle Abrasive
Baking soda has always been my go-to for any gentle scrubbing task. One weekend, I noticed the stainless steel sink looking a bit worse for wear after a particularly chaotic family dinner. I whipped up a paste using baking soda and water, then gently rubbed it along the grain with a soft cloth. After rinsing it off, I dried it with a towel. The sink looked almost brand new! Plus, knowing it’s non-toxic was a relief since my kids are always around.
| Household Item | Benefits | Usage Instructions |
|---|---|---|
| White Vinegar | Streak-free, eco-friendly | Mix with water; spray and wipe with microfiber cloth |
| Baking Soda | Gentle abrasive, non-toxic | Make paste; rub with soft cloth; rinse and dry |
| Olive Oil | Adds shine, protects | Dab on cloth; buff in direction of grain; wipe excess |
Adding Shine with Olive Oil
One evening, while prepping dinner, I noticed the stovetop looking particularly drab. With olive oil right on the counter, I thought, "Why not?" I dabbed a little onto a soft cloth and buffed it into the surface following the grain. Not only did it shine like new, but the olive oil also seemed to act as a protective layer. Later that week when the kids’ fingerprints appeared on everything else but the stove, I knew I’d found my solution.
Comparing Household Items with Commercial Products
I often wonder if I’m missing out by not using commercial products. But honestly, for everyday cleaning these household items do the trick. They’re effective enough for most tasks and are kinder to the environment—and my wallet—than many commercial options. Sure they might not achieve that showroom finish every time but they’re good enough for the everyday hustle of family life.
If you’re pondering whether to stick with household items or invest in commercial cleaning products4, think about what matters more: sustainability or convenience. Personally I’ve always leaned towards the former.
Vinegar leaves a streak-free shine on stainless steel.True
Vinegar's acidity breaks down grime, leaving surfaces streak-free.
Olive oil creates a greasy residue on stainless steel.False
Properly applied, olive oil adds shine without leaving grease.
How can I achieve a mirror-like finish on stainless steel?
Have you ever found yourself marveling at the impeccable shine of stainless steel and wondered how you could achieve that same mirror-like finish at home?
To get that stunning mirror-like finish on stainless steel, start with a meticulous cleaning, progress through sanding with increasingly finer grits, and finish off with a polishing compound using a buffing wheel.
Preparing the Stainless Steel Surface
Before diving into the polishing process, I always start with a clean slate. Picture this: a sunny Saturday morning, a cup of coffee in hand, and I’m ready to tackle that old stainless steel sink that’s lost its luster over the years. I make sure it’s spotless by using a mild detergent and warm water. Trust me, getting rid of every speck of dirt and grease is crucial to avoid those pesky scratches during sanding.
Sanding Techniques
The sanding part? It’s a bit like meditation for me. I remember the first time I sanded my grandmother’s old stainless steel kettle—each stroke felt like I was slowly uncovering its hidden beauty. Starting with a coarse grit (around 120) and moving up to finer ones (up to 3000) is key. Each level serves its purpose, from erasing deep scratches to setting the stage for a flawless polish.
| Grit Level | Purpose |
|---|---|
| 120-400 | Remove deep scratches |
| 600-1000 | Smoothen the surface |
| 1500-3000 | Prepare for polishing |
Polishing Compounds and Buffing
After sanding, it’s time for the magic touch—the polishing compounds. My go-to has always been a trusty tripoli compound to start with, followed by rouge for that final dazzling finish. I remember working on my first DIY project—a small stainless steel table—and the moment I saw my reflection in it, I knew all the effort was worth it. Using a buffing wheel or even just a soft cloth works wonders if you focus on small sections and apply consistent pressure.
Different polishing compounds5 are available for specific finishes.
Tools and Equipment
Over the years, I’ve learned that quality tools make all the difference. Investing in a bench grinder with a buffing wheel attachment was a game-changer for me, especially when I decided to revamp my kitchen with all stainless steel appliances. For smaller tasks, handheld rotary tools are my best friends—versatile and efficient.
Explore various buffing wheels6 designed for specific tasks. Felt wheels are excellent for final finishing steps.
Safety Precautions
I can’t stress enough the importance of safety gear. Imagine being halfway through a project only to be sidelined by an avoidable injury. Always have your safety goggles and gloves on hand to protect against those fine metal particles.
Common Mistakes to Avoid
In my early days, I made plenty of mistakes—like skipping grit levels because I was too eager to see the final product. Over time, I learned patience is key. Skipping stages or overloading the buffing wheel led to uneven finishes and more work in the long run.
For comprehensive guidance, check out these polishing guides7 detailing different techniques and tools suitable for various projects.
Skipping grit levels results in visible scratches.True
Each sanding stage removes scratches from the previous grit, ensuring smoothness.
Using excessive compound ensures a smoother finish.False
Overloading the buffing wheel can lead to an uneven finish, not smoother.
What Are Common Mistakes to Avoid When Polishing Stainless Steel?
Ever tried polishing stainless steel only to find it scratched and dull instead of shiny and smooth? Let’s avoid those common mistakes together.
When polishing stainless steel, steer clear of harsh abrasives, ensure you clean the surface first, and avoid using too much pressure. A gentle approach keeps your stainless steel looking its best.
Understanding the Basics of Stainless Steel
Before I learned the ins and outs of polishing stainless steel, I had my fair share of mishaps. Stainless steel can be a bit finicky, easily picking up scratches and stains8 if not handled properly. It’s crucial to choose the right cleaning materials to prevent any damage.
Table: Abrasives Comparison
| Abrasive Type | Use Case | Pros | Cons |
|---|---|---|---|
| Soft Cloth | General cleaning | Gentle on surfaces | Less effective on tough stains |
| Fine Sandpaper | Removing deep scratches | Effective scratch removal | May cause micro-scratches if used improperly |
| Steel Wool | Heavy-duty cleaning | Removes rust and stubborn stains | Can scratch if not used carefully |
Cleaning Before Polishing
I remember the first time I skipped cleaning before polishing; the results were less than stellar. Dirt particles left tiny scratches all over my piece. Now, I always start with a thorough cleaning using a mild detergent or specialized stainless steel cleaner9.
Avoiding Excessive Pressure
In my early days, I’d press down hard, thinking more pressure meant more shine. Big mistake! That approach led to scratches and distortions. I’ve since learned that gentle, even strokes are key.
Consistency in Technique
I used to be all over the place with my polishing technique, which resulted in uneven finishes. Maintaining consistent motion and pressure is something I’ve gotten better at, often using a circular motion10 for an even shine.
Choosing the Right Polish
Once, I grabbed the wrong polish in a hurry and ended up damaging the finish. That taught me to always choose polishes specifically designed for stainless steel to avoid any unwanted chemical reactions or damage.
Rinsing Residue Thoroughly
After polishing, I sometimes used to forget about rinsing off residue, which left behind streaks and water spots. Now, I’m careful to rinse thoroughly and dry with a clean microfiber cloth to keep everything crystal clear.
By being mindful of these common mistakes, I’ve managed to keep my stainless steel pieces pristine and reflective, enhancing their beauty and longevity.
Neglecting to clean before polishing causes scratches.True
Dirt particles can cause scratches if not removed before polishing.
Using excessive pressure prevents surface damage.False
Excessive pressure can lead to scratches or distortions on stainless steel.
Conclusion
Learn effective techniques to polish stainless steel, including cleaning, sanding, and using household items like vinegar and baking soda for a brilliant shine without damaging the surface.
-
Explore the variety of polishing compounds to match your project’s needs and achieve the desired finish. ↩
-
Learn how to maintain the shine of your polished surfaces effectively with expert tips. ↩
-
Vinegar is a natural cleaner that effectively removes grime while being eco-friendly. ↩
-
This link explores the differences in effectiveness and environmental impact between household items and commercial cleaners. ↩
-
Learn about different compounds for achieving specific finishes, from initial polish to ultra-shiny effects. ↩
-
Understand which buffing wheels are best suited for various polishing tasks, enhancing the finish quality. ↩
-
Explore detailed guides offering diverse techniques and tool recommendations for perfect stainless steel finishes. ↩
-
Discover how scratches form on stainless steel and learn preventative measures. ↩
-
Find top-rated cleaners that prepare stainless steel surfaces for polishing. ↩
-
Explore why circular motions are recommended for even polishing results. ↩






