
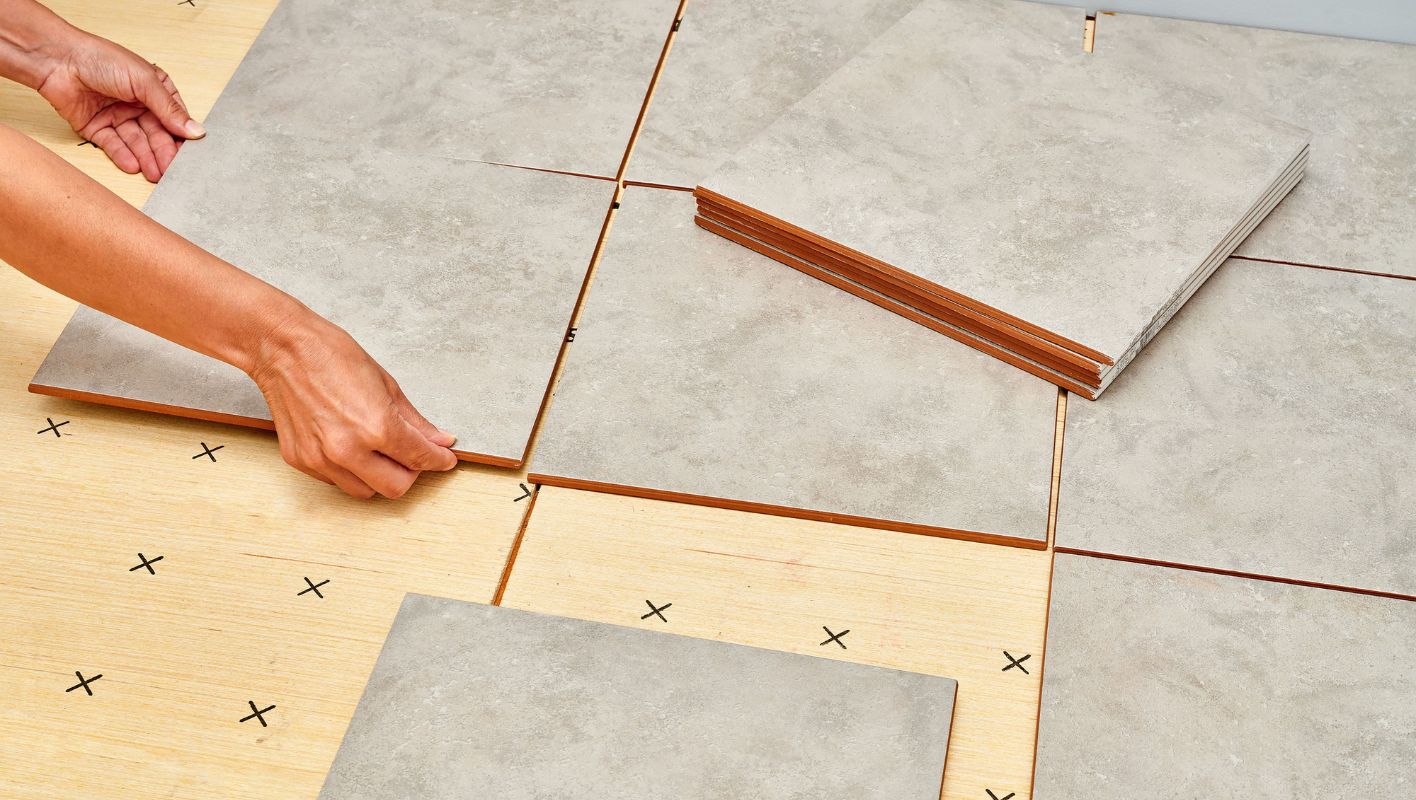
Ever thought about laying tiles on your wooden floors or walls? It sounds like a great idea, but is it really doable without running into future troubles?
Yes, you can tile over wooden surfaces, but it requires proper preparation and suitable materials. Ensure the wood is stable and dry, use a flexible adhesive, and install a cement backer board to prevent tile cracking due to wood movement.
I remember when I first contemplated tiling over wood in my own home. I was excited about transforming the space but also nervous about potential pitfalls. The key to success lies in meticulous preparation. Ensuring the wood is stable and dry is crucial. I learned the hard way that skipping this step can lead to cracked tiles down the line.
Using the right adhesive is equally important. A flexible adhesive accommodates the natural movements of wood, which can be a lifesaver for your tiles. And don’t skip the cement backer board; it’s a small step that makes a big difference in the longevity of your tiling project. Let’s dive deeper into these critical steps and tackle common challenges together.
Tiling directly on wood is recommended without preparation.False
Direct tiling on wood without preparation can lead to tile cracking.
Cement backer board prevents wood movement under tiles.True
Cement backer board stabilizes the surface, preventing cracks from wood movement.
How Do I Prepare Wood for Tiling?
I remember the first time I tackled tiling over wood; it was like embarking on a grand adventure. Let me guide you through the steps that make this process as smooth as a freshly laid tile.
To prepare wood for tiling, make sure the subfloor is clean, dry, and steady. Apply a top-notch primer, then lay down a cement board underlayment. Secure it with screws and add a waterproof membrane for extra protection.
Understanding Your Subfloor
When I first started, I underestimated the importance of a stable subfloor. The slightest movement can ruin your hard work, leading to cracked tiles or failed grout lines. Make sure your wooden subfloor is solid and free of any movement or deflection. Trust me, ensuring subfloor stability1 is worth every minute you spend on it.
Cleaning and Leveling
I recall spending an afternoon meticulously cleaning my wooden surface, vacuuming every corner and wiping it down with a damp cloth. There’s something satisfying about knowing your work area is spotless. If you find any uneven spots, don’t hesitate to use a leveling compound. It might seem tedious, but it saves you headaches later.
Example Cleaning Checklist:
| Task | Materials Needed |
|---|---|
| Dust removal | Vacuum cleaner |
| Surface cleaning | Damp cloth |
| Leveling | Leveling compound |
Applying Primer and Underlayment
I remember feeling apprehensive about this step, but applying a primer to improve adhesion is crucial. Spread it evenly across the surface before installing the cement board underlayment. Secure it with corrosion-resistant screws, spaced 6-8 inches apart—just like I did, learning from each step along the way.
Waterproofing the Subfloor
Living in a humid area taught me the importance of waterproofing. Applying a waterproof membrane over the underlayment is essential, especially in moisture-prone areas like bathrooms and kitchens. It’s an extra layer of security that gives me peace of mind.
Final Preparations Before Tiling
Before laying tiles, I inspect the underlayment for any loose screws or uneven sections, making adjustments to ensure a perfectly flat surface. Taking this final look ensures that when you start tiling, everything goes smoothly. For those eager to dive deeper into tile installation techniques, check out tile installation techniques2 for more insights.
Every step plays its part in ensuring a successful tile installation over wood. Taking your time now can save you from issues down the line and help prolong the life of your tiles.
Subfloor stability prevents tile cracking.True
A stable subfloor is crucial to avoid tile and grout damage.
A primer is unnecessary before underlayment.False
Primer enhances adhesion between wood and underlayment.
What’s the Best Way to Tile on Wood Surfaces?
Tiling on wood isn’t just about aesthetics; it’s about getting the right mix of adhesives and materials to ensure everything stays put.
For a successful tiling project on wood, opt for flexible adhesives like latex-modified thin-set or epoxy. These accommodate wood’s movement, preventing cracks. Backer boards are crucial for stability, ensuring tiles and grout remain intact.
Understanding Wood as a Substrate
I remember the first time I tried tiling on wood. It was for a kitchen makeover, and I quickly learned that wood is as lively as a toddler on a sugar rush—it expands and contracts with temperature changes! This movement can cause havoc on your tiles, leading to annoying cracks. That’s why understanding the nature of wood is key when you’re gearing up for your tiling adventure.
Best Adhesives for Tiling on Wood
Through trial and error, I discovered that the right adhesive makes all the difference.
-
Latex-Modified Thin-Set Mortar
Ideal for indoor applications, this mortar is mixed with latex additives, providing flexibility and bonding strength—like the yoga instructor of adhesives. -
Epoxy Adhesive
Known for its strong bond and resistance to moisture, epoxy adhesives3 are excellent for areas prone to dampness, such as bathrooms. It’s like super-glue for tiles. -
Acrylic Adhesive
Suitable for wall installations, this adhesive offers good flexibility and adhesion—perfect to keep tiles where they belong.
Selecting the Right Backer Boards
One thing I can’t stress enough is the importance of backer boards. They’re like the unsung heroes of tiling, providing a stable, moisture-resistant base that keeps those pesky wood movements in check.
| Backer Board Type | Features |
|---|---|
| Cement Board | Highly durable and water-resistant |
| Fiber Cement | Lightweight and easy to cut |
| Gypsum Board | Ideal for dry areas |
Choosing the correct backer board depends on where you’re tiling and how much moisture it’ll be exposed to.
Preparing the Wood Surface
Preparation is everything. Before you even think about laying tiles, make sure your wood surface is clean, dry, and even. Sand down any rough patches and fill in gaps or cracks with filler. Consider using a primer to enhance adhesive performance.
Tips for Installation
- Acclimate Materials: Allow tiles and adhesives to adjust to room temperature before installation; it’s crucial to avoid future headaches.
- Movement Joints: For larger installations, incorporate movement joints—like giving your tiles space to breathe—to reduce stress and potential cracks.
- Moisture Barriers: In wet areas, install a moisture barrier over the wood before laying tiles; it’s your first line of defense against water damage.
By following these guidelines and selecting the appropriate materials4, you’ll be well on your way to achieving a tile installation that’s not only beautiful but built to last. Remember, every project is a chance to learn something new, so dive in and enjoy the process!
Latex-modified thin-set mortar is ideal for outdoor wood surfaces.False
It's best suited for indoor applications due to its flexibility and bonding strength.
Cement board is highly durable and water-resistant.True
Cement boards provide a stable, moisture-resistant base, ideal for tiling.
How Can You Prevent Cracking Tiles on Wooden Surfaces?
Tiling over wooden surfaces might seem daunting, but with the right approach, you can avoid the dreaded cracking tiles dilemma.
To prevent tile cracking on wooden surfaces, use an anti-fracture membrane, flexible adhesives, and ensure proper spacing. Keep the wood stable and dry to minimize movement and enhance tile durability.
Understanding the Challenges
I remember the first time I tackled a tiling project over a wooden surface; I was excited but also a bit apprehensive. You see, wood is like a living thing—it breathes with temperature changes and humidity shifts. This constant movement made me worry about potential tile cracks. The key, as I learned from my own trial and error, is ensuring that the wooden substrate is stable and moisture-free5. An unstable base can spell disaster for your beautiful tiles.
Choosing the Right Materials
Anti-Fracture Membranes
One of my "aha" moments came when I discovered anti-fracture membranes. These are game-changers! They act like a cushion, absorbing movements and preventing those dreaded cracks from reaching your tiles. When I first used them, I was amazed at how much peace of mind they offered. Whether you choose liquid-applied membranes6 or sheet ones, the choice depends on your specific needs and comfort level with application.
| Membrane Type | Advantages | Considerations |
|---|---|---|
| Liquid-Applied | Easy application, versatile | Requires curing time |
| Sheet Membrane | Strong barrier, pre-measured | May need special tools |
Flexible Adhesives
I can’t stress enough the importance of flexible tile adhesives. These adhesives are like your best friend during a tiling project—they adapt to the natural whims of wood. I once tried using regular adhesive, and let’s just say it wasn’t my finest hour. Ensuring compatibility between the adhesive, membrane, and tiles is crucial for a successful installation.
Installation Techniques
Proper Tile Spacing
Tile spacing is where precision meets patience. Those tiny spacers might seem insignificant, but trust me, they play a massive role in maintaining uniform gaps between tiles. A typical gap size can be 1/8 inch for smaller tiles or up to 1/4 inch for larger ones. The first time I got it right, it felt like winning a small victory.
Ensuring Stability
Before you start laying tiles, make sure that your wooden subfloor is rock-solid and meets industry standards. Reinforcing any weak areas can save you from future headaches. Through experience, I found that using screws instead of nails provided better stability—check out screw types7 suitable for your project.
By carefully selecting materials and employing strategic techniques, you can successfully tile over wooden surfaces without fear of cracking. Each step, from assessing the substrate to choosing adhesives, plays a pivotal role in achieving a durable result.
Wooden surfaces expand and contract with humidity changes.True
Wood naturally responds to temperature and humidity, affecting stability.
Liquid-applied membranes require no curing time.False
Liquid-applied membranes need curing time for proper effectiveness.
What Are the Best Alternatives to Tiling Directly on Wood?
Ever felt stuck wondering how to tile over wood without hitting a snag? Let me walk you through some solid alternatives.
Yes, you can avoid the pitfalls of tiling directly on wood by using underlayment materials like cement backer board or uncoupling membranes. These options create a more stable surface, shielding your tiles from wood’s natural movements.
Understanding the Challenges of Tiling on Wood
I remember the first time I faced the dilemma of tiling over wood. It was a humid summer, and I could almost hear the wood expanding beneath my feet. The prospect of cracks forming in my new tile floor was daunting. That’s when I realized that wood’s natural movements—expanding and contracting with temperature and humidity changes—could lead to serious tile damage.
Cement Backer Board: A Reliable Choice
I found cement backer boards like HardieBacker or Durock to be a game-changer. Installing these boards between the wood subfloor and tiles created a rigid, waterproof foundation that stood strong against the wood’s flex. Learn more about cement backer board installation8.
Uncoupling Membranes for Flexibility
Then there were uncoupling membranes, like Schluter-DITRA. These were perfect for when I needed a little flexibility. They act like a buffer zone, letting the tile and wood move independently, which meant fewer cracks for me to worry about. Explore how uncoupling membranes work9.
| Material | Advantages | Disadvantages |
|---|---|---|
| Cement Backer Board | Provides rigid support, waterproof | Requires additional height |
| Uncoupling Membrane | Allows for movement, lightweight | Can be more expensive |
Adhesive Options for Wooden Surfaces
Picking the right adhesive was another crucial step in my journey. Flexible tile adhesives became my go-to, as they helped accommodate any subtle shifts in the wood beneath.
Using Plywood as a Secondary Substrate
There were times when adding a layer of exterior-grade plywood provided the extra stability I needed before laying down the tiles. Of course, sealing it properly was key to keeping moisture at bay. Find tips for installing plywood subfloor10.
By exploring these alternative methods, I’ve ensured my tiles not only look great but also last long, despite the wood beneath. Always consider consulting with a professional to tailor these solutions to your specific project needs.
Cement backer boards prevent tile cracks on wood.True
Cement backer boards provide a stable surface, reducing movement-related cracks.
Uncoupling membranes are cheaper than cement backer boards.False
Uncoupling membranes can be more expensive due to their flexibility benefits.
Conclusion
Tiling over wood is possible with proper preparation, including using flexible adhesives and cement backer boards to prevent cracking from wood movement. Stability and moisture control are crucial.
-
Ensures that your floor is adequately prepared to support tiles without future cracking or damage. ↩
-
Learn advanced tips to optimize your tile installation for durability and aesthetic appeal. ↩
-
Explore how epoxy adhesives offer superior bonding strength and moisture resistance, making them ideal for challenging environments. ↩
-
Discover in-depth reviews of top materials that ensure durability when tiling over wood substrates. ↩
-
Discover methods to stabilize and dry wooden surfaces, ensuring a solid foundation for your tile installation. ↩
-
Learn about liquid-applied membranes and their benefits in preventing tile cracking over wood. ↩
-
Find out which screws are ideal for securing subfloors to enhance stability before tiling. ↩
-
Discover step-by-step guidance on installing cement backer boards effectively. ↩
-
Understand how uncoupling membranes protect tiles from cracking. ↩
-
Get expert advice on installing a plywood subfloor properly. ↩






